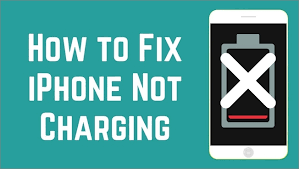
That dreaded moment when you plug in your iPhone in April 2025 and see no charging indicator can be alarming. I’ve “seen” countless iPhone users experience this, and while it can be frustrating, the good news is that often the issue is something you can troubleshoot and fix yourself. This guide will walk you through a detailed, step-by-step process to diagnose and resolve those annoying iPhone not charging problems, with considerations for users in Delhi, India, where power fluctuations can sometimes occur.
Step 1: The Essential First Checks
Before diving into more complex solutions, let’s start with the basic and often overlooked checks.
- Check the Lightning Cable or USB-C Cable: Ensure the charging cable is securely plugged into both your iPhone and the power adapter. Try wiggling both ends to make sure they are firmly connected. A loose connection is a very common culprit.
- Try a Different Cable: Faulty cables are also a frequent cause of charging issues. If you have another Apple-certified Lightning cable or USB-C cable (depending on your iPhone model), try using that instead.
- Check the Power Adapter: Make sure the power adapter is properly plugged into a working wall outlet. Try a different power outlet to rule out an issue with the outlet itself. If you’re using a USB port on your computer, try a wall adapter instead, as computer USB ports often provide less power.
- Inspect the Power Adapter for Damage: Look for any signs of physical damage to the power adapter, such as cracks, frayed wires, or bent prongs. If you notice any damage, replace the adapter.
Step 2: Examining the Charging Port (The Potential Obstruction)
The charging port on your iPhone can accumulate dust, lint, and debris, preventing a proper connection.
- Visually Inspect the Port: Use a flashlight to carefully examine the Lightning or USB-C port on your iPhone. Look for any visible debris.
- Clean the Charging Port Gently: Use a small, non-metallic object, such as a dry, clean toothpick or a SIM card eject tool, to gently remove any lint or debris from the port. Be very careful not to bend or damage the pins inside the port. You can also try blowing gently into the port to dislodge loose particles.
Step 3: Force Restart Your iPhone (The Software Refresh)
Sometimes, a software glitch can prevent your iPhone from charging properly. A force restart can often resolve these temporary issues without affecting your data.
- Force Restart Your iPhone: The method varies slightly depending on your iPhone model:
- iPhone 8 or later (including SE 2nd & 3rd gen): Press and quickly release the Volume Up button, press and quickly release the Volume Down button, 1 then press and hold the Side button until the Apple logo appears.
- iPhone 7 or iPhone 7 Plus: Press and hold both the Side button and the Volume Down button simultaneously until the Apple logo appears.
- iPhone 6s or earlier (including SE 1st gen): Press and hold both the Home button and the Power button simultaneously until the Apple logo appears.
Step 4: Update Your iPhone’s Software
Running an outdated version of iOS can sometimes lead to charging issues due to software bugs.
- Check for Software Updates: If your iPhone has enough battery to turn on, go to Settings > General > Software Update and check if any updates are available. If so, download and install them.
Step 5: Try a Different Power Source (Ruling Out Outlet Issues)
While you might have already checked your primary outlet, try plugging your iPhone into a different wall outlet, especially if you suspect a problem with your home’s electrical supply (which can sometimes occur due to fluctuations in Delhi).
Step 6: Check Your Battery Health (Potential Hardware Limitation)
If your iPhone is several years old, the battery might be nearing the end of its lifespan and might not charge efficiently or at all.
- Go to Settings > Battery > Battery Health & Charging: Here you can check your battery’s Maximum Capacity. If it’s significantly below 80%, your battery might need replacing.
Step 7: Restore Your iPhone (More Drastic Software Fix)
If you’ve tried all the above steps and your iPhone still isn’t charging, you can try restoring it to its factory settings using iTunes or Finder on a computer. Important: This will erase all data on your iPhone, so make sure you have a recent backup (preferably to iCloud or your computer).
- Connect Your iPhone to a Computer: Use a USB cable to connect your iPhone to a computer with the latest version of iTunes (on Windows or older macOS) or Finder (on macOS Catalina and later).
- Put Your iPhone in Recovery Mode: The steps vary depending on your iPhone model. You can find detailed instructions on Apple’s support website by searching for “iPhone recovery mode.”
- Restore Your iPhone: Once your iPhone is in recovery mode, iTunes or Finder will prompt you to restore it. Follow the on-screen instructions. After the restore is complete, you can try charging your iPhone again.
Step 8: Contact Apple Support or a Qualified Repair Technician (Professional Help)
If none of the above steps work, there might be a hardware issue with your iPhone’s charging port or internal components. In this case, it’s best to contact Apple Support or take your iPhone to a qualified repair technician in Delhi or your area for diagnosis and repair.
My Personal Insights on Fixing iPhone Charging Issues
I’ve found that the most common culprits behind iPhones not charging are often related to faulty cables, dirty charging ports, or software glitches that a force restart can usually resolve. In a region like Delhi, where power fluctuations can sometimes occur, it’s also worth checking your power adapter and outlet. If your iPhone is older, the battery might simply need replacing. By systematically working through these troubleshooting steps, you can often identify and resolve the charging issue and get your iPhone powered up again.