Author: Mahak Tayal

  • How to Enable Color Profiles on Windows for Design Work

    How to Enable Color Profiles on Windows for Design Work

    Color accuracy is crucial in design tasks like photo editing, illustration, or digital publishing. Whether you’re a graphic designer or a photographer, enabling and configuring color profiles on your Windows machine can ensure colors are displayed consistently across devices. This guide explains how to enable and manage color profiles for optimal accuracy.

    Step 1: Understand What a Color Profile Does

    A color profile tells your system how to display colors accurately. Windows uses ICC profiles (International Color Consortium) to standardize color output between your monitor, software, and print. This consistency is vital for design work.

    Step 2: Calibrate Your Monitor (Optional, but Recommended)

    Before setting a color profile, calibrate your monitor. Accurate calibration ensures your color profile reflects real-world output.

    Option A: Use Built-in Calibration Tool

    • Go to Settings > System > Display.
    • Scroll down and click Advanced display settings.
    • Click Display adapter properties > Color Management > Color Management tab.
    • Select Calibrate display.

    Option B: Use a Hardware Calibrator Tools like the Datacolor SpyderX or X-Rite i1Display Pro are more accurate. These often create and install a custom ICC profile.

    Step 3: Open Windows Color Management

    1. Press Windows + R to open the Run dialog.
    2. Type colorcpl and hit Enter.

    This opens the Color Management window.

    Step 4: Select the Correct Display

    1. Under the Devices tab, select your monitor from the drop-down menu.
    2. Check the box labeled Use my settings for this device.

    Step 5: Add a New Color Profile

    1. Click Add…
    2. You’ll see a list of installed profiles. If your calibration software added a profile, it will appear here.
    3. To use a manufacturer-supplied profile or one downloaded online:
      • Click Browse… and locate the .icc or .icm file.
    4. Click Add to include it in the list.

    Step 6: Set the Profile as Default

    1. Select the profile from the list.
    2. Click Set as Default Profile.

    Windows will now use this profile for color rendering.

    Step 7: Adjust Advanced Color Settings (Optional)

    1. Go to the Advanced tab.
    2. Set the Device Profile to your newly added profile.
    3. Optionally, change the Windows Color System Defaults. For most design tasks, sRGB IEC61966-2.1 is a common baseline unless using a wide-gamut monitor.

    Step 8: Validate the Color Profile

    To ensure everything works correctly:

    • Open a color-accurate image or test chart.
    • Use tools like Photoshop or Lightroom to verify consistency.
    • In Photoshop, go to Edit > Color Settings and verify your working RGB space aligns with your display profile.

    Step 9: Recalibrate Periodically

    Monitor accuracy can drift. Professionals recalibrate every 2–3 months. Rerun your calibration software or create a new profile as needed.

    Common Troubleshooting Tips

    • Profile not showing: Ensure you’re applying the profile to the correct display.
    • Colors still appear off: Check your monitor’s internal settings (avoid using overly vivid presets).
    • Profile keeps resetting: Disable any manufacturer software that may override Windows settings (e.g., Dell PremierColor).
  • How to Restore Windows to an Earlier Date Without Losing Files

    How to Restore Windows to an Earlier Date Without Losing Files

    Facing unexpected issues with your Windows PC – perhaps a newly installed program causes crashes, a driver update leads to instability, or system settings get messed up? It’s a common scenario that can be incredibly frustrating. While a full factory reset might seem like the only solution, there’s a less drastic and often more convenient option: System Restore.

    System Restore is a built-in feature of the Windows operating system that allows you to revert your computer’s system files, installed applications, Windows Registry, and system settings back to a previous point in time, known as a Restore Point. The crucial advantage of this method is that it’s designed to not affect your personal files. This means your documents, photos, videos, and other personal data stored in your user folders remain untouched during the restoration process.

    This feature has been a staple of Windows since Windows Millennium Edition (Windows ME), serving as a vital troubleshooting tool. In modern Windows versions (Windows 10 and 11), it continues to be an invaluable safety net for software-related problems.

    Understanding System Restore Points

    A Restore Point is essentially a snapshot of your system at a particular moment. Windows automatically creates restore points during significant events like major updates, driver installations, or some software installations. You can also manually create a restore point before making potentially risky changes.

    What a System Restore operation does and does not affect:

    • Affects (Reverts):
      • System files (core Windows files)
      • Installed applications (programs you’ve installed)
      • Drivers
      • Windows Registry (the database of system settings)
      • System settings (e.g., display settings, power options)
    • Does NOT Affect:
      • Your personal files (documents, pictures, music, videos, downloads)
      • Emails
      • Browser history or favorites (unless they are part of a program’s system files)

    The goal is to reverse system-level changes that might be causing problems, effectively “undoing” recent software installations or configuration changes.

    When to Use System Restore

    System Restore is your go-to solution for:

    • Resolving issues after installing a problematic program or driver.
    • Fixing system instability that started after a recent change in settings.
    • Recovering from unintended Windows Registry modifications.
    • Addressing general system slowdowns that aren’t related to disk space or hardware.
    • Dealing with minor malware infections that have altered system files (though a full scan is always recommended).

    Pre-Restoration Steps (Important)

    While System Restore is designed to protect your personal files, it’s always prudent to take a few preparatory steps to ensure peace of mind.

    1. Backup Critical Personal Files (Extra Precaution): Although System Restore generally doesn’t affect personal files, unforeseen circumstances can occur. For absolute peace of mind, consider quickly backing up your most critical documents, photos, and projects to an external drive or cloud storage. This is a universally good practice regardless of the troubleshooting step.
    2. Save Your Work: Close all open applications and save any active work before starting the restoration process.
    3. Ensure Power Stability: If you’re on a laptop, plug it into a power outlet. If you’re on a desktop, ensure a stable power supply. The restoration process should not be interrupted.

    Step-by-Step Guide: Restoring Windows to an Earlier Date

    This process is largely the same for both Windows 10 and Windows 11.

    Method 1: From Within Windows (When Windows Can Boot)

    This is the most common and easiest way if your computer can still boot into the operating system.

    1. Access System Restore:
      • Click the Start button.
      • Type create a restore point in the search bar and select the result that says “Create a restore point”. This will open the System Properties window to the System Protection tab.
      • Alternatively, you can open the Control Panel, navigate to System and Security > System, and then click System protection on the left.
    2. Launch System Restore Wizard: In the System Protection tab, click the System Restore… button.
    3. Follow the Wizard:
      • The System Restore wizard will open. Click Next.
      • You will see a list of available restore points. These are typically listed by date and time, along with a description (e.g., “Installed Windows Update,” “Manual Restore Point”).
      • Choose a restore point: Select the restore point that predates your system issue. For example, if your problem started on June 25, 2025, choose a restore point from June 24, 2025, or earlier.
      • Show more restore points: If you don’t see a suitable point, check the box for “Show more restore points” to see a more comprehensive list.
      • Scan for affected programs: It’s highly recommended to click “Scan for affected programs”. This will show you a list of programs and drivers that will be removed (because they were installed after the selected restore point) and programs that might be restored (because they were removed after the selected restore point). Review this list to understand the impact.
      • Click Next.
    4. Confirm Restore Point: Review the restore point details and ensure it’s the correct one.
    5. Initiate Restore: Click Finish. You will see a warning that System Restore cannot be interrupted once it starts. Click Yes to confirm.
    6. Restart and Restore: Your computer will restart and begin the restoration process. This can take anywhere from a few minutes to an hour or more, depending on the size of the restore point and your system’s speed. Do NOT turn off or restart your computer during this process.
    7. Completion: Once complete, your computer will boot back into Windows, and a message will confirm that System Restore completed successfully.

    Method 2: From Advanced Startup Options (When Windows Won’t Boot)

    If your Windows PC fails to boot normally, you can access System Restore from the Advanced Startup Options (Windows Recovery Environment – WinRE).

    1. Access Advanced Startup Options:
      • Method A (Force Shutdown): Turn on your computer. As soon as you see the Windows logo, immediately press and hold the power button until the computer turns off. Repeat this two or three times. On the third or fourth attempt, Windows should automatically enter the “Automatic Repair” environment, leading to “Advanced Startup Options.”
      • Method B (Windows Installation Media): If Method A doesn’t work, you’ll need a Windows installation USB drive or DVD. Boot your PC from this media (you might need to change the boot order in BIOS/UEFI). On the “Windows Setup” screen, click Next, then click “Repair your computer” in the bottom-left corner.
    2. Navigate to System Restore:
      • On the “Choose an option” screen, select Troubleshoot.
      • Then select Advanced options.
      • Click System Restore.
    3. Follow the Wizard:
      • Select your account and enter your password if prompted.
      • The System Restore wizard will launch, similar to Method 1.
      • Choose a restore point and follow the on-screen prompts to complete the restoration.
      • Your computer will restart and complete the process.

    Important Notes and Limitations

    • System Restore is Not a Backup: It’s critical to understand that System Restore is not a substitute for regular data backups. It only restores system files, applications, and settings, not your personal documents or other user data. Always back up your important files separately.
    • Disk Space for Restore Points: System Restore requires dedicated disk space. If you don’t allocate enough, older restore points will be deleted automatically. Ensure System Protection is enabled for your system drive (usually C:) and enough space is allocated (typically 3-5% of drive capacity).
    • Cannot Revert Major Windows Versions: System Restore cannot revert your Windows operating system to an earlier major version (e.g., from Windows 11 back to Windows 10, or from a major Windows 10 feature update like 22H2 back to 21H2). For that, you’d typically use the “Go back to the previous version” option in Recovery settings (available for a limited time after an upgrade) or a clean install.
    • Driver Rollback: If a specific driver is causing issues, sometimes a driver rollback via Device Manager might be a quicker fix than System Restore, especially if you only want to affect that specific component.
    • Malware: While System Restore can revert some system changes made by malware, it may not remove the malware itself if it’s deeply embedded or has affected areas outside of what System Restore monitors. Always follow up with a full anti-malware scan.

    FAQ Section

    Q1: Will System Restore delete my personal files, like photos and documents?

    No, System Restore is designed to not affect your personal files. Your documents, photos, music, videos, and other user data will remain untouched during the restoration process. It primarily impacts system files, installed programs, drivers, and Windows Registry settings.

    Q2: What is the difference between “System Restore” and “Reset this PC”?

    System Restore reverts your system to an earlier state without touching personal files, focusing on undoing recent software changes. “Reset this PC” effectively reinstalls the entire Windows operating system, giving you the option to either keep your personal files (while removing all installed apps) or remove everything for a complete wipe. “Reset this PC” is a more drastic measure than System Restore.

    Q3: Why can’t I find any restore points?

    If you can’t find any restore points, it likely means that System Protection is not enabled for your system drive. You need to enable it first through the System Properties > System Protection tab and allocate disk space for restore points. Windows also automatically deletes older restore points to make space, so very old points might no longer be available.

    Q4: How much space do restore points take up, and how many are kept?

    The amount of space restore points take up depends on the percentage of your drive’s capacity you allocate (usually 3-5%). The number of points kept varies based on the allocated space and how frequently changes occur on your system. Once the allocated space is full, Windows automatically deletes the oldest restore points to make room for new ones.

    Q5: Can I undo a System Restore?

    Yes, in most cases, after performing a System Restore, Windows creates an “Undo Restore” point. If the restoration didn’t fix your problem or caused new issues, you can perform another System Restore and select the “Undo my last restoration” option to revert to the state before the restore.

  • How to Fix Sound Not Working After Windows update

    How to Fix Sound Not Working After Windows update

    You’ve just finished installing a Windows update, but when you go to play a video or listen to music, you’re met with silence. It’s a frustratingly common problem: a routine update accidentally disrupts your audio settings or drivers. The good news is that this is almost always fixable.

    This guide will walk you through the most effective methods to fix your audio, starting with the simplest checks and moving to the more definitive solutions. As someone who has troubleshooted this exact issue many times, I can assure you that following these steps systematically will give you the best chance of getting your sound back quickly.

    First, a Few Basic Checks (Don’t Skip These!)

    Before diving into system settings, let’s rule out the simple culprits. In a moment of panic, it’s easy to overlook these, but they solve the problem more often than you’d think.

    • Check the Volume: Click the speaker icon in the bottom-right of your taskbar. Ensure the volume is not muted (there should be no ‘X’ next to the speaker) and that the slider is turned up.
    • Check Physical Connections: If you use external speakers or a headset, make sure the cables are securely plugged into the correct audio port (usually the green one). Try unplugging and plugging them back in.
    • Select the Correct Playback Device: A Windows update can sometimes change your default audio device.
      1. Right-click the speaker icon in your taskbar.
      2. Select Sound settings.
      3. Under the Output section, you will see a dropdown menu for “Choose where to play sound.”
      4. Click the menu and make sure your primary speakers or headphones are selected. It might have been switched to a monitor or another connected device.

    If these basics don’t restore your sound, it’s time to dig a little deeper.

    Method 1: Use the Built-in Windows Audio Troubleshooter

    Windows has an automated tool designed specifically to find and fix common audio problems. This should always be your first major troubleshooting step.

    1. Right-click the speaker icon in the taskbar.
    2. Select Troubleshoot sound problems.
    3. The troubleshooter will launch. Follow the on-screen prompts, selecting the audio device that is giving you trouble.
    4. The tool will check for issues with drivers, services, and settings and attempt to apply a fix automatically.

    Method 2: Fix Your Audio Drivers

    The most common reason for sound not working after an update is that the update installed a faulty or incompatible audio driver. We can address this using the Device Manager.

    How to Open Device Manager:

    Right-click on the Start Menu and select Device Manager from the list. Once it’s open, click the arrow to expand the Sound, video and game controllers category. You’ll see your audio device listed here (e.g., “Realtek High Definition Audio,” “NVIDIA High Definition Audio”).

    Option A: Roll Back the Audio Driver

    If your sound was working perfectly before the update, rolling back to the previous driver is the quickest potential fix.

    1. In Device Manager, right-click your audio device and select Properties.
    2. Go to the Driver tab.
    3. Click the Roll Back Driver button.
    4. Choose a reason for rolling back and click Yes.
    5. If this button is grayed out, it means there is no previous driver to roll back to. In that case, proceed to the next option.

    Option B: Manually Reinstall the Audio Driver (Most Effective)

    This method involves completely uninstalling the driver, forcing Windows to do a clean reinstallation after a restart. This often resolves stubborn conflicts.

    1. In Device Manager, right-click your audio device and select Uninstall device.
    2. A confirmation box will pop up. Important: If you see a checkbox that says “Attempt to remove the driver for this device,” leave it unchecked for your first try. Click Uninstall.
    3. After the device disappears from the list, restart your computer.
    4. When your PC boots up, Windows will automatically detect the “new” hardware and reinstall a fresh driver. Check if your sound is working.

    If the sound is still not working, repeat the process, but this time, check the box to “Attempt to remove the driver for this device” before uninstalling. After restarting, if sound is still not working, your best bet is to visit the support website for your PC manufacturer (e.g., Dell, HP, Lenovo) or your motherboard manufacturer (e.g., MSI, ASUS) to download and install the latest official audio driver for your specific model.

    Method 3: Check Windows Audio Services

    For sound to function, certain background services need to be running. An update can occasionally stop them.

    1. Press the Windows key + R to open the Run dialog.
    2. Type services.msc and press Enter.
    3. In the Services window, scroll down and locate these two services:
      • Windows Audio
      • Windows Audio Endpoint Builder
    4. For both services, ensure their Status is “Running” and their Startup Type is “Automatic.”
    5. If a service isn’t running, right-click it and choose Start. If its startup type isn’t “Automatic,” right-click it, select Properties, change the Startup type to Automatic, and click OK.

    Method 4: Disable Audio Enhancements

    Sometimes, software “enhancements” designed to improve sound can conflict with a new driver or update. Disabling them can restore basic audio functionality.

    1. Right-click the speaker icon and go to Sound settings.
    2. Scroll down and click on More sound settings.
    3. In the new window, go to the Playback tab.
    4. Right-click your default device (the one with the green checkmark) and select Properties.
    5. Go to the Enhancements tab.
    6. Check the box that says Disable all enhancements or Disable all sound effects.
    7. Click Apply and OK.

    By working through these steps methodically, you can diagnose the root cause of your audio issue and get your sound working again, turning a frustrating problem into a solved one.

  • How to Install Chocolatey or Winget in Windows

    Manually downloading and installing software on Windows can quickly become a chore. You visit websites, hunt down installers, click through wizards, and often uncheck bundled offers. It’s especially tedious when setting up a new PC or updating many apps. That’s where package managers like Chocolatey and Winget step in—they make installing and updating software as simple as typing a command.

    I’ve relied on both extensively, and honestly, they save hours of time and clicks. This guide will walk you through installing Chocolatey or Winget, show you basic usage, and help you decide which fits your needs best.

    What Are Package Managers and Why Use Them?

    Think of a package manager like an app store controlled from the command line. Instead of searching websites, you type a command, and the manager handles downloading, installing, and updating your software automatically.

    • Chocolatey: An open-source, mature package manager with a large community repository of thousands of apps.
    • Winget (Windows Package Manager): Microsoft’s official tool, built into recent Windows versions, using a centralized repository curated by Microsoft and the community.

    Both solve the hassle of managing software installations and updates in a consistent way—great for developers, IT pros, and power users.

    Method 1: How to Install Winget (Windows Package Manager)

    Winget often comes pre-installed on Windows 10 (version 1709 or later) and Windows 11, but if not, here’s how to get it.

    Step 1: Check if Winget is Already Installed

    1. Open Windows Terminal (or PowerShell/Command Prompt) as administrator.
    2. Type:

    nginx

    Copy

    winget

    1. If you see a list of commands and options, Winget is ready. If you get an error like ‘winget’ is not recognized, move to Step 2.

    Step 2: Install Winget via Microsoft Store

    1. Open the Microsoft Store app.
    2. Search for App Installer.
    3. Select App Installer by Microsoft Corporation.
    4. Click Install or Update if available.
    5. Restart your terminal and verify Winget with winget.

    Step 3: Manual Installation (If Microsoft Store is Unavailable)

    1. Visit the Winget GitHub releases page.
    2. Download the latest stable .msixbundle file under Assets.
    3. Double-click the file and follow prompts in the App Installer.
    4. After installation, restart your terminal and type winget to confirm.

    Basic Winget Usage

    • Search packages:

    php-template

    Copy

    winget search <package_name>

    • Install a package:

    php-template

    Copy

    winget install <package_ID>

    • Upgrade all packages:

    css

    Copy

    winget upgrade –all

    • Show package info:

    php-template

    Copy

    winget show <package_ID>

    • Uninstall a package:

    php-template

    Copy

    winget uninstall <package_ID>

    Method 2: How to Install Chocolatey

    Chocolatey is a veteran package manager with an extensive software library.

    Step 1: Open PowerShell as Administrator

    1. Click Start.
    2. Search PowerShell.
    3. Right-click Windows PowerShell and choose Run as administrator.

    Step 2: Adjust Execution Policy

    Paste this command and press Enter to temporarily allow script execution:

    powershell

    Copy

    Set-ExecutionPolicy Bypass -Scope Process -Force;

    Step 3: Install Chocolatey

    Paste this installation script and hit Enter:

    powershell

    Copy

    iex ((New-Object System.Net.WebClient).DownloadString(‘https://chocolatey.org/install.ps1’))

    Let it run—Chocolatey will download and install. Look for the success message.

    Step 4: Verify Installation

    Close and reopen PowerShell (as administrator), then type:

    powershell

    Copy

    choco

    If you see Chocolatey’s version info and help text, you’re all set.

    Basic Chocolatey Usage

    • Search packages:

    php-template

    Copy

    choco search <package_name>

    • Install a package:

    php-template

    Copy

    choco install <package_name>

    • Upgrade a package:

    php-template

    Copy

    choco upgrade <package_name>

    • Upgrade all packages:

    css

    Copy

    choco upgrade all

    • List installed packages:

    css

    Copy

    choco list –local-only

    • Uninstall a package:

    php-template

    Copy

    choco uninstall <package_name>

    Choosing Between Chocolatey and Winget

    Feature Chocolatey Winget
    Maturity More mature, larger package base Newer, Microsoft-backed
    Community Large, active Growing, official Microsoft
    Repository Community-driven Microsoft + community curated
    Installation PowerShell script Microsoft Store app / manual
    Elevated Rights Needs admin PowerShell Needs admin PowerShell
    Typical Use Broad software, dev tools General apps, integrated in Windows

    Tips:

    • For most users on modern Windows versions, start with Winget—it’s integrated and improving fast.
    • If you need specific or legacy packages, Chocolatey might have more options.
    • Many developers and IT pros use both tools to cover all bases.

    Troubleshooting Common Issues

    • ‘winget’ not recognized? Make sure App Installer is installed and restart your terminal.
    • ‘choco’ not recognized? Confirm you ran the install script as admin and reopened PowerShell as admin.
    • Permission errors? Always run PowerShell/terminal as Administrator for installing or upgrading.
    • Internet connection? Both need active internet to download packages.
    • Antivirus/Firewall blocks? Temporarily disable if you suspect interference, then re-enable after installation.

    Using Chocolatey or Winget will drastically improve your Windows software management, making installations and updates fast, simple, and repeatable. Give it a try and reclaim your time from manual installs!

  • How to Disable Background Apps in Windows

    How to Disable Background Apps in Windows

    Does your Windows PC feel sluggish, even when you’re not running many programs? The issue might be background apps. These are applications that continue working behind the scenes, using up your CPU, memory, and battery—often without you realizing it. Even after closing them or not interacting with them directly, many apps stay active, checking for updates, syncing data, or sending notifications.

    Disabling unnecessary background apps can help you reclaim valuable system resources. It’s a simple step that can noticeably improve performance, especially on older machines or laptops. Let’s go over how to find and disable these background processes in both Windows 10 and 11.

    What Are Background Apps and Why Disable Them?

    Background apps are those that keep performing tasks even when they aren’t open on your screen. Think of a weather app updating in the background, or a messaging app scanning for new notifications. While some of these are helpful, many are not strictly necessary.

    Benefits of disabling background apps:

    • Better Performance: Reduces CPU and RAM usage, which helps your system run more smoothly.
    • Longer Battery Life: Laptops benefit from fewer apps consuming power in the background.
    • Lower Data Usage: Especially helpful if you’re on a metered connection—less syncing means less data consumed.
    • Improved Privacy: Limits what apps can do or access when you’re not actively using them.

    Method 1: Using Windows Settings (Windows 10 & 11)

    Windows Settings is the most accessible way to control background activity.

    For Windows 11:

    1. Open Settings: Click Start > Gear icon, or press Windows key + I.
    2. Go to Apps in the sidebar.
    3. Click Apps & features.
    4. Find the app you want to manage, click the three-dot menu, and select Advanced options.
    5. Under Background app permissions, you’ll find a dropdown:
      • Choose Never to fully block background activity.
      • Power optimized allows Windows to decide based on system usage.
      • Always lets the app run freely.
    6. Repeat this for other apps as needed.

    Expert Tip: Windows 11 gives you more control than Windows 10, offering optimization levels instead of just on/off toggles.

    For Windows 10:

    1. Open Settings: Click Start > Gear icon, or press Windows key + I.
    2. Select Privacy.
    3. Scroll down to Background apps in the left panel.
    4. You’ll see a switch for “Let apps run in the background”:
      • Turn this Off to block all apps.
      • Or, keep it On and disable apps individually below.

    Personal Insight: When I noticed my older laptop’s battery life dwindling, disabling non-essential background apps (like the calculator or news widgets) made a noticeable improvement. Messaging and cloud apps stayed on, everything else went off.

    Method 2: Terminate Background Processes via Task Manager

    Sometimes apps are already running in the background and need to be stopped immediately. Here’s how:

    Step-by-Step Guide:

    1. Open Task Manager:
      • Right-click the Taskbar > “Task Manager”
      • Or press Ctrl + Shift + Esc
    2. Click More details if you see a simplified view.
    3. In the Processes tab, look under Apps and Background processes.
    4. Identify any non-essential apps using resources (look at CPU, Memory, and Disk columns).
    5. To stop one:
      • Select it
      • Click End task at the bottom-right

    Caution: Avoid ending unfamiliar or system-critical processes (like Windows Explorer or your antivirus). If you’re unsure, a quick online search of the process name can help.

    Note: This stops the app temporarily. It will start again the next time you open it or restart your PC unless disabled through Method 1.

    Method 3: Managing Startup Apps (Complementary Step)

    While technically a separate setting, many apps that run in the background also auto-launch when Windows starts. It’s smart to manage these too.

    Quick Recap:

    1. Open Task Manager (Ctrl + Shift + Esc)
    2. Go to the Startup tab.
    3. Right-click any unnecessary app and choose Disable.

    This helps prevent apps from auto-starting and running background processes before you even open them.

    By taking the time to manage and disable background apps, you gain more control over your PC’s resources. Whether you’re looking to extend battery life, speed things up, or just clean up your system, these methods make a noticeable difference. Regularly reviewing your app permissions and startup behavior is a small habit with big payoffs.

  • How to Find Large Files Taking Up Space in Windows

    How to Find Large Files Taking Up Space in Windows

    How to Find Large Files Taking Up Space in Windows

    Is your Windows drive running low on space? Over time, large files can accumulate, silently eating away at your valuable storage. Identifying these space hogs is the first crucial step to freeing up disk space and improving your computer’s performance. Knowing how to find large files taking up space in Windows is a fundamental skill for maintaining a healthy and efficient system. This guide will walk you through various methods, from built-in Windows tools to third-party solutions, ensuring you can quickly pinpoint and manage those oversized files.

    Why Find Large Files Taking Up Space in Windows?

    Locating and managing large files taking up space in Windows is essential for several reasons:

    • Free Up Disk Space: The most obvious benefit. More free space means your computer can run more smoothly.
    • Improve Performance: Low disk space can lead to a sluggish system, slow application loading, and even system crashes.
    • Prevent Errors: Critical Windows updates often require significant free space.
    • Better Organization: Helps you understand what’s stored on your drive and keep it tidy.
    • Backup Efficiency: Knowing where large files are helps prioritize what to back up.
    • Identify Unnecessary Data: You might discover forgotten downloads, old video projects, or duplicated files you no longer need.

    Common Culprits for Large Files:

    • Video Files: Movies, TV shows, screen recordings, unedited video projects.
    • Game Installations: Modern games can take up hundreds of gigabytes.
    • ISO Files: Disk images for operating systems or large software.
    • Backup Files: Old system backups, phone backups.
    • Unused Software Installers: Downloaded .exe or .msi files that were never deleted.
    • Temporary Files and Cache: While usually smaller, large accumulated caches can be an issue.
    • Duplicate Files: Multiple copies of the same large file.

    Step-by-Step Guide: How to Find Large Files Taking Up Space in Windows

    Windows offers several built-in tools, and there are excellent third-party utilities that make this task much easier.

    Method 1: Using Windows Storage Sense (Windows 10 & 11)

    Storage Sense is a powerful built-in tool that provides an overview of your disk usage and helps manage temporary and large files.

    1. Open Settings:
      • Click the Start button.
      • Select Settings (the cogwheel icon).
      • Alternatively, press Windows key + I.
    2. Navigate to Storage Settings:
      • In the Settings window, click on “System” in the left-hand menu.
      • Then, click on “Storage”.
    3. Analyze Drive Usage:
      • You’ll see a breakdown of your drive usage (e.g., “Apps & features,” “Temporary files,” “Documents,” “Other”).
      • Click on “Show more categories” (Windows 11) or scroll down to see a more detailed breakdown (Windows 10).
    4. Identify Large File Categories:
      • Look for categories that are consuming significant space.
      • “Temporary files”: This is a great place to start cleaning. Click on it to see options for deleting old downloads, Recycle Bin contents, and temporary app files.
      • “Other” / “Documents” / “Pictures” / “Videos”: These categories often contain user-generated large files. Clicking on them might not directly show you individual files, but it gives you an idea of where to look next.
      • “Apps & features”: Shows installed programs. You can uninstall large, unused programs from here.
    5. Utilize “Cleanup recommendations” (Windows 11):
      • On Windows 11, under “Storage usage,” you’ll find “Cleanup recommendations.” Click this.
      • This section intelligently suggests files you can safely delete, including large unused files, synced cloud files, and temporary files. It’s often the easiest way to start freeing up space.
    6. Run Storage Sense (Optional Automation):
      • On the main Storage screen, you can also toggle “Storage Sense” to “On.”
      • Click “Configure Storage Sense or run it now” to customize when it automatically cleans up temporary files and Recycle Bin content.

    Method 2: Using File Explorer Search (Windows 10 & 11)

    File Explorer’s search capabilities allow you to filter files by size.

    1. Open File Explorer:
      • Click the File Explorer icon (folder icon) on your taskbar.
      • Alternatively, press Windows key + E.
    2. Select the Drive to Search:
      • In the left pane, click on “This PC” or the specific drive you want to analyze (e.g., Local Disk (C:)).
    3. Start a Search:
      • In the search bar at the top right of the File Explorer window, type “size:” followed by a size category.
      • Common Size Categories:
        • size:gigantic (Greater than 128 MB)
        • size:huge (128 MB to 1 GB)
        • size:large (1 MB to 128 MB)
      • Custom Size (More Precise): For more control, you can use greater than/less than operators:
        • size:>1GB (finds files larger than 1 Gigabyte)
        • size:>=500MB (finds files larger than or equal to 500 Megabytes)
        • size:<100MB (finds files smaller than 100 Megabytes)
    4. Sort by Size:
      • After the search results populate, click on the “Size” column header to sort the files from largest to smallest. This will immediately show you the biggest files.
    5. Refine Search (Optional):
      • You can combine size searches with file types (e.g., *.mp4 size:>1GB to find large video files) or dates (e.g., date:last year size:>500MB).
    6. Manage Files:
      • Once you’ve identified large files, you can right-click on them to delete, move to an external drive, or upload to cloud storage.

    Method 3: Using Disk Cleanup (Older but Still Useful)

    While Storage Sense is the modern approach, Disk Cleanup is a classic Windows tool for removing temporary and system files.

    1. Open Disk Cleanup:
      • Click the Start button.
      • Type “Disk Cleanup” and press Enter.
    2. Select Drive:
      • Choose the drive you want to clean (usually C:). Click “OK.”
    3. Scan and Select Files:
      • Disk Cleanup will scan your drive.
      • In the list of “Files to delete,” check the boxes next to categories you want to clean (e.g., “Temporary Internet Files,” “Recycle Bin,” “Temporary files”).
    4. Clean Up System Files (Crucial for large files):
      • For more significant space savings, click “Clean up system files.” This will restart the scan but include options like “Windows Update Cleanup,” “Previous Windows installation(s),” and “Windows upgrade log files,” which can be very large.
      • After the second scan, select the additional categories you wish to delete.
    5. Confirm Deletion:
      • Click “OK” and then “Delete Files” to confirm.

    Method 4: Using Third-Party Disk Space Analyzer Tools (Highly Recommended for Visual Overview)

    For a comprehensive, visual understanding of disk usage, third-party tools are often superior.

    • Recommended Tools:
      • WinDirStat: Free, open-source, and provides a unique graphical “treemap” view of your disk, where larger blocks represent larger files/folders. Extremely intuitive for identifying space hogs.
      • TreeSize Free: Another excellent free utility that quickly scans drives and presents a detailed, sortable list of folders and files by size.
      • SpaceSniffer: Similar to WinDirStat, offering a clear visual representation.
    • How to Use (General Steps for Most Tools):
    1. Download and Install: Download the chosen tool from its official website.
    2. Run as Administrator: Launch the tool (often needs administrator privileges to scan all areas).
    3. Select Drive: Choose the drive you want to scan.
    4. Analyze Results: The tool will scan and then display a graphical or hierarchical view of your disk space.
    5. Drill Down: Click on large folders or blocks to “drill down” and see what files are inside. This quickly guides you to the biggest culprits.
    6. Manage Files: Most tools allow you to right-click on identified files/folders to delete them, open their location, or move them.

    My Personal Experience with Finding Large Files

    I’ve been in the situation countless times where my C: drive was inexplicably full, slowing everything down. Initially, I just deleted temporary files and ran Disk Cleanup, but it never freed up enough space. That’s when I discovered WinDirStat. The first time I ran it, seeing that colorful treemap instantly showed me that gigabytes of space were being eaten up by old game installation files I’d forgotten about, and huge video clips from a project I’d finished months ago, buried deep in obscure folders. The visual representation made it incredibly easy to pinpoint the culprits, even those hidden away, allowing me to recover massive amounts of space. It transformed how I approached disk management and became my go-to tool for deep dives into storage usage.

    Conclusion

    Knowing how to find large files taking up space in Windows is a fundamental skill for maintaining a healthy and responsive computer. Whether you prefer the built-in Windows Storage Sense and File Explorer search, the classic Disk Cleanup, or the powerful visual insights of third-party disk analyzers, you have multiple effective methods at your disposal. By regularly identifying and managing these oversized files, you can ensure your Windows system remains performant and free from storage-related slowdowns.

  • How to Run Windows in Safe Mode from Boot

    How to Run Windows in Safe Mode from Boot

    When your Windows PC encounters critical errors, won’t start normally, or is plagued by persistent software conflicts, Safe Mode is your go-to diagnostic tool. Safe Mode starts Windows with only the essential drivers and services, disabling most third-party applications and non-critical components. This minimalist environment allows you to troubleshoot issues like malware infections, problematic drivers, or software conflicts without interference from the elements causing the problem in normal mode.

    While you can often enter Safe Mode from within a running Windows environment, knowing how to run Windows in Safe Mode from boot (i.e., when your PC won’t start normally) is a crucial skill for advanced troubleshooting. This guide will cover the most effective and reliable methods to force your Windows 10 or Windows 11 PC into Safe Mode during the startup sequence.

    How to Run Windows in Safe Mode from Boot

    When your Windows PC won’t boot normally, or you suspect a severe software issue, entering Safe Mode from boot is often the first step in diagnosis and repair. Safe Mode loads only the core components of Windows, bypassing potentially problematic drivers, applications, and services that might be preventing your system from functioning correctly. This guide outlines the primary methods to force your Windows 10 or Windows 11 computer into Safe Mode during startup.

    Understanding Safe Mode

    Safe Mode is a diagnostic startup mode for Windows. It differs from a normal boot in several key ways:

    • Minimal Drivers: Only essential drivers (for keyboard, mouse, basic display, and core system components) are loaded.
    • Limited Services: Only critical Windows services run.
    • No Third-Party Applications: Most third-party programs are prevented from launching, including antivirus software, graphics card utilities, and startup apps.
    • Standard Graphics: Display resolution is often low (e.g., 800×600 or 1024×768), and some visual effects are disabled.

    This stripped-down environment helps you pinpoint if a problem is caused by a hardware driver, a third-party application, or a non-essential service.

    Method 1: Force Automatic Repair (The Most Common Approach When Windows Fails to Boot)

    If your Windows PC fails to start normally multiple times in a row, it will automatically enter the Windows Recovery Environment (WinRE), which provides options to get into Safe Mode. This is often the situation where you need to force Safe Mode from boot.

    1. Repeatedly Interrupt the Boot Process:
      • Turn on your PC.
      • As soon as you see the Windows logo (or the spinning dots), immediately press and hold the Power button for 5-10 seconds to force a hard shutdown.
      • Repeat this process 2-3 times.
      • On the third or fourth attempt, Windows should recognize that it’s having startup problems and will automatically boot into the Windows Recovery Environment (WinRE).
    2. Navigate to Startup Settings:
      • Once in WinRE, you’ll see a screen titled “Automatic Repair” or “Recovery.”
      • Click “Advanced options”.
      • From the “Choose an option” screen, select “Troubleshoot.”
      • Then, select “Advanced options.”
      • Finally, select “Startup Settings.”
    3. Restart to Access Startup Options:
      • On the “Startup Settings” screen, click “Restart.”
      • Your computer will restart, and you’ll be presented with a list of startup options.
    4. Choose Safe Mode:
      • Use the number keys or function keys (F1-F9, depending on your keyboard layout) to select your desired Safe Mode option:
        • Press 4 or F4 for Enable Safe Mode (most common).
        • Press 5 or F5 for Enable Safe Mode with Networking (if you need internet access for troubleshooting, e.g., downloading drivers).
        • Press 6 or F6 for Enable Safe Mode with Command Prompt (for advanced users who prefer command-line troubleshooting).
    5. Windows will then boot into Safe Mode. You’ll see “Safe Mode” written in the corners of your screen.

    Method 2: Boot from a Windows Installation Media (USB Drive or DVD)

    This method is reliable if Method 1 doesn’t trigger WinRE or if you need more control over the boot process. You’ll need a Windows 10 or Windows 11 installation USB drive or DVD.

    1. Create Installation Media: If you don’t have one, create a Windows installation media (USB drive) using the Media Creation Tool from Microsoft’s official website on another working PC.
    2. Boot from Media:
      • Insert the Windows installation USB drive or DVD into your problematic PC.
      • Restart your PC.
      • Immediately start pressing the BIOS/UEFI boot menu key (commonly F2, F10, F12, Del, or Esc, varies by manufacturer) to access the boot menu.
      • Select your USB drive or DVD drive from the boot menu to boot from it.
    3. Navigate to Repair Your Computer:
      • Once the Windows Setup screen appears, select your language, time, and keyboard preferences, then click “Next.”
      • On the next screen, click “Repair your computer” (do NOT click “Install now”).
    4. Access Startup Settings (Same as Method 1, Step 2 onwards):
      • You’ll now be in the Windows Recovery Environment (WinRE).
      • Click “Troubleshoot.”
      • Then, select “Advanced options.”
      • Select “Startup Settings.”
      • Click “Restart.”
    5. Choose Safe Mode:
      • Once your computer restarts, you’ll see the list of startup options.
      • Press 4 or F4 for Enable Safe Mode, 5 or F5 for Enable Safe Mode with Networking, or 6 or F6 for Enable Safe Mode with Command Prompt.
    6. Windows will then boot into Safe Mode.

    Method 3: Using MSConfig (If You Can Briefly Access Windows)

    While the objective is “from boot,” sometimes a PC might boot into Windows for a few seconds before crashing. If you can quickly get into the desktop, MSConfig can be used to set a permanent Safe Mode boot.

    1. Open System Configuration (MSConfig):
      • Press Windows key + R to open the Run dialog.
      • Type msconfig and press Enter.
    2. Go to Boot Tab:
      • In the System Configuration window, click on the “Boot” tab.
    3. Enable Safe Boot:
      • Under “Boot options,” check the box next to “Safe boot.”
      • You can choose the type of Safe Mode:
        • Minimal: Standard Safe Mode.
        • Network: Safe Mode with Networking.
        • (Avoid “Active Directory repair” unless you’re in a domain environment and know what you’re doing.)
        • (Avoid “Alternate shell” as it’s for Command Prompt only, typically “Minimal” or “Network” is what users need.)
    4. Apply and Restart: Click “Apply,” then “OK.” You’ll be prompted to restart your computer.
    5. Confirm Safe Mode: Your PC will now automatically boot into Safe Mode.
    6. Important: Disable Safe Boot After Troubleshooting: Once you’ve finished troubleshooting in Safe Mode, you MUST go back into MSConfig (steps 1-2) and uncheck “Safe boot” on the Boot tab. If you don’t, your PC will continue to boot into Safe Mode every time.

    Troubleshooting in Safe Mode

    Once you’re in Safe Mode, you can attempt various troubleshooting steps:

    • Uninstall Recently Installed Software: If the problem started after installing a new program, uninstall it via Settings > Apps > Installed apps (Windows 11) or Apps & features (Windows 10).
    • Update/Roll Back Drivers: Go to Device Manager (right-click Start button). If a device has a yellow exclamation mark, try updating its driver (right-click > Update driver) or rolling back to a previous version (right-click > Properties > Driver tab > Roll Back Driver).
    • Run Antivirus Scan: While your main antivirus might not load, you can run a scan with Windows Security (built-in) or a portable antivirus scanner.
    • Run System File Checker (SFC): Open Command Prompt (Admin) (if using Safe Mode with Command Prompt or by searching in Safe Mode Start menu) and type sfc /scannow to check for and repair corrupted system files.
    • Perform a System Restore: If you have a restore point created before the issue, you can revert your system to that state. Search for “Create a restore point” and click “System Restore.”

    Exiting Safe Mode

    To exit Safe Mode and boot back into normal Windows:

    • If you used Method 1 or 2: Simply restart your PC. It should automatically boot into normal mode.
    • If you used Method 3 (MSConfig): You must go back into MSConfig, uncheck the “Safe boot” option on the “Boot” tab, click “Apply,” “OK,” and then restart your PC.

    Knowing how to run Windows in Safe Mode from boot is an invaluable skill for any PC user. It provides a clean, controlled environment to diagnose and resolve a wide array of Windows startup and stability issues, allowing you to get your computer back to normal operation.

  • how to use Microsoft PowerToys in Windows 11

    how to use Microsoft PowerToys in Windows 11

    Microsoft PowerToys is a powerful set of utilities designed to enhance productivity and customize the Windows experience. For Windows 11 users, PowerToys offers several tools that can streamline workflows, improve window management, and add features not native to the operating system. This article will explain how to install and use Microsoft PowerToys in Windows 11 effectively, with practical guidance based on current tools and personal insights.

    What Are Microsoft PowerToys?

    PowerToys is a collection of free, open-source utilities developed by Microsoft that add advanced features to Windows. The tools address common productivity challenges and customization needs. Some key modules include FancyZones, PowerRename, Keyboard Manager, and File Explorer add-ons.

    Step 1: Installing Microsoft PowerToys

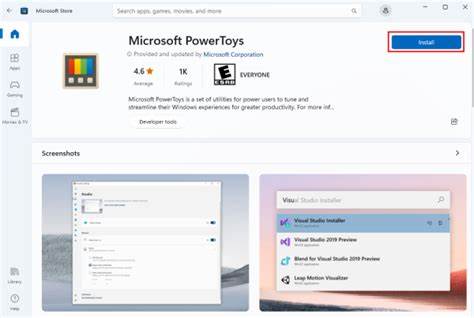
    • Visit the official PowerToys GitHub page or Microsoft Store.
    • Download the latest stable release for Windows 11.
    • Run the installer and follow on-screen instructions.
    • Launch PowerToys from the Start menu or system tray.

    Installation is straightforward and lightweight, enabling quick access to utilities.

    Step 2: Overview of PowerToys Utilities

    After installation, open PowerToys Settings to explore the available modules. Notable utilities include:

    • FancyZones: Custom window manager for snapping and arranging windows.
    • PowerRename: Advanced bulk renaming tool for files.
    • Keyboard Manager: Remap keys or create shortcuts.
    • File Explorer Add-ons: Preview SVG and Markdown files directly.
    • PowerToys Run: Quick launcher to open apps, files, or run commands.
    • Image Resizer: Right-click context menu to resize images.

    Step 3: Using FancyZones for Window Management

    FancyZones allows creating customizable grid layouts for windows.

    • Open PowerToys Settings > FancyZones.
    • Click Edit Zones to design your window layouts.
    • Hold the Shift key (or custom key) while dragging windows to snap into defined zones.
    • Create layouts suitable for multitasking, such as columns or grids.

    FancyZones helps maintain an organized desktop, improving workflow efficiency.

    Step 4: Bulk Rename Files with PowerRename

    PowerRename simplifies renaming multiple files at once.

    • Select multiple files in File Explorer.
    • Right-click and choose PowerRename.
    • Use search and replace patterns or regular expressions.
    • Preview changes before applying them.

    This tool saves time during file organization or batch edits.

    Step 5: Remap Keys Using Keyboard Manager

    Customize keyboard input for better usability.

    • Open Keyboard Manager in PowerToys.
    • Select Remap a key or Remap a shortcut.
    • Assign new functions to keys or create new shortcut combinations.
    • Save and test remapped keys.

    This utility is useful for adapting keyboards or fixing problematic keys.

    Step 6: Preview SVG and Markdown Files in File Explorer

    PowerToys enhances File Explorer by adding previews for file types like SVG and Markdown.

    • Enable the File Explorer add-ons module.
    • Open File Explorer and select an SVG or Markdown file.
    • Preview content in the preview pane without opening external apps.

    This feature improves file browsing and reduces context switching.

    Step 7: Use PowerToys Run for Fast Searching

    PowerToys Run is a launcher that speeds up opening apps and files.

    • Press Alt + Space to open PowerToys Run.
    • Type the name of the app, file, or command.
    • Select from search results to launch instantly.

    This launcher is faster than the default Windows search and supports plugins.

    Step 8: Resize Images Quickly with Image Resizer

    Easily resize images from the context menu.

    • Right-click one or multiple images.
    • Select Resize pictures.
    • Choose predefined or custom sizes.
    • Click Resize to generate new files.

    Image Resizer is perfect for preparing images for email or web upload.

    Step 9: Customize PowerToys Settings

    • Open the main PowerToys window.
    • Adjust global shortcuts, update preferences, and module settings.
    • Enable or disable individual utilities as needed.

    Fine-tuning settings optimizes PowerToys for your specific needs.

    Personal Experience and Tips

    Using Microsoft PowerToys has streamlined my multitasking by managing windows with FancyZones and sped up file management with PowerRename. PowerToys Run replaced my need for third-party launchers due to its speed and simplicity.

    Conclusion

    Microsoft PowerToys adds valuable features to Windows 11, enhancing productivity and customization. By installing PowerToys and using utilities like FancyZones, PowerRename, and PowerToys Run, you can tailor Windows to your workflow. Explore settings and regularly update PowerToys to benefit from ongoing improvements.

  • How to Clear Cache on Samsung Android Phone

    How to Clear Cache on Samsung Android Phone

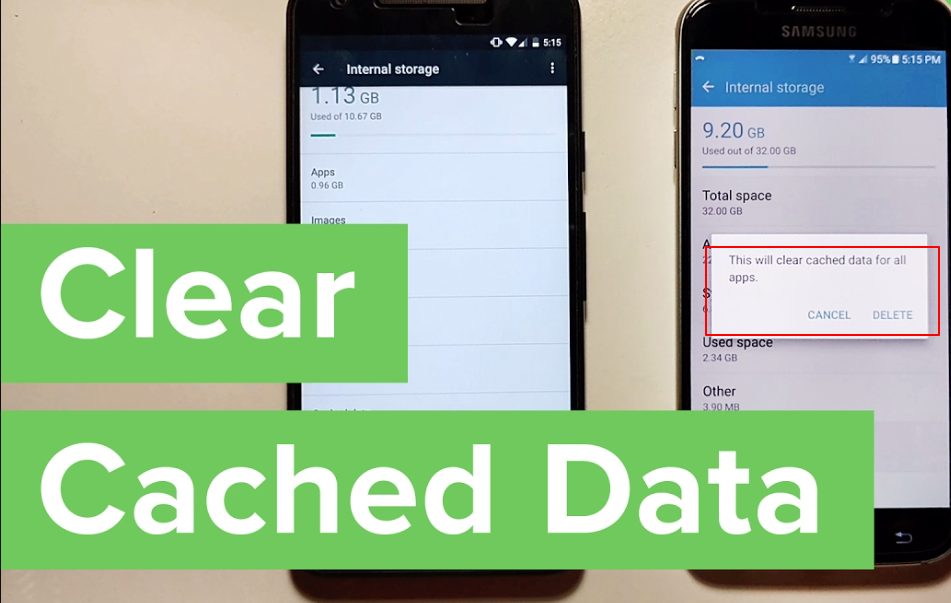
    Clearing cache on your Samsung Android phone helps free up storage, fix app glitches, and improve overall device performance. Cache stores temporary files that apps use to speed up operations, but over time, this data can become large or corrupted. Regularly clearing cache is a simple maintenance task to keep your phone running smoothly.

    This guide explains how to clear cache on Samsung phones thoroughly, covering individual apps and system cache methods.

    What Is Cache and Why Clear It?

    Cache is temporary data saved by apps and the system to speed up loading times and enhance user experience. However:

    • Excess cache consumes storage space.
    • Corrupted cache can cause app crashes or sluggishness.
    • Clearing cache removes temporary files but does not delete personal data.

    Clearing cache is safe and often recommended when apps misbehave or storage is low.

    Step 1: Clear Cache for Individual Apps

    If a specific app is slow or crashing, clear its cache:

    1. Open Settings.
    2. Tap Apps or Applications.
    3. Scroll and select the app causing issues.
    4. Tap Storage.
    5. Tap Clear cache.

    This removes temporary files related only to that app. The app’s data and settings remain intact.

    Step 2: Clear Cache for Multiple Apps via Storage Settings

    To review cached data for all apps:

    1. Go to Settings > Device care (or Device maintenance).
    2. Tap Storage.
    3. Tap Clean now or Clean cache if available.
    4. Follow prompts to clear unnecessary cached files.

    This frees space by clearing cache from multiple apps at once.

    Step 3: Clear System Cache Partition (Advanced)

    Samsung devices store system cache separately. Clearing this can fix system-wide issues without affecting personal data.

    How to clear system cache:

    1. Power off your phone.
    2. Press and hold the Volume Up, Power, and Home/Bixby buttons simultaneously (button combos vary by model).
    3. Release buttons when the Samsung logo appears.
    4. Use volume buttons to navigate to Wipe cache partition.
    5. Press the Power button to select.
    6. Confirm with Yes.
    7. Once done, select Reboot system now.

    This clears system cache safely and can resolve performance glitches.

    Step 4: Use Samsung Device Care for Automatic Cache Cleaning

    Samsung Device Care provides automated tools to optimize performance:

    1. Open Settings > Device care.
    2. Tap Optimize now to scan for cached data and background apps.
    3. Follow recommendations to free up space and improve speed.

    Step 5: Clear Cache from Browser Apps (e.g., Samsung Internet, Chrome)

    Cached files in browsers can grow large over time:

    • Open your browser app.
    • Go to Settings > Privacy > Delete browsing data.
    • Select Cached images and files.
    • Tap Delete or Clear data.

    This frees up space and can fix browsing issues.

    Personal Tips and Experience

    Regularly clearing app caches helped me avoid app freezes and saved significant storage on my Samsung phone. Clearing system cache once a month maintained system responsiveness. Combining manual clearing with Device Care’s optimization strikes a good balance.

    Important Notes

    • Clearing cache does not delete login info or app settings.
    • Avoid clearing app data unless you want to reset the app completely.
    • Clearing cache too frequently is unnecessary; do it when experiencing issues or low storage.
    • Backup important data regularly for added safety.

    Conclusion

    Clearing cache on a Samsung Android phone is a straightforward process that improves speed and fixes common app problems. You can clear cache for individual apps or system-wide through recovery mode. Using built-in tools like Device Care makes maintenance easy. Follow these steps to keep your Samsung phone running smoothly.

  • how to fix no signal on Samsung Smart TV HDMI

    how to fix no signal on Samsung Smart TV HDMI

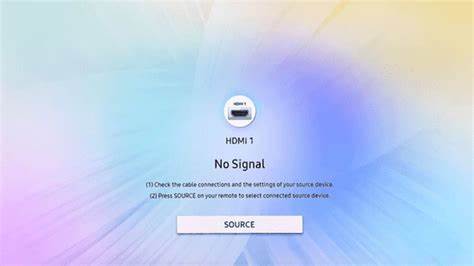
    A No Signal message on your Samsung Smart TV when using an HDMI connection can be frustrating. This problem means the TV is not detecting any video or audio signal from the connected device, such as a cable box, gaming console, or Blu-ray player. The issue could stem from cable problems, incorrect settings, or hardware glitches. This detailed guide explains how to fix No Signal on Samsung Smart TV HDMI with simple, practical solutions.

    Common Causes of No Signal on Samsung Smart TV HDMI

    • Loose or damaged HDMI cable.
    • Incorrect HDMI input selected on TV.
    • Faulty HDMI port on TV or device.
    • Device not powered on or malfunctioning.
    • Outdated TV software.
    • HDMI UHD Color setting issues.
    • Firmware bugs or temporary glitches.

    Step 1: Check the HDMI Cable and Connections

    The most common reason is a loose or faulty HDMI cable.

    • Unplug the HDMI cable from both the TV and the device.
    • Inspect the cable for damage such as bent or broken pins.
    • Reconnect the cable firmly into the TV’s HDMI port and the device.
    • Try a different HDMI cable if available.
    • Test with a different HDMI port on your TV.

    Note: Samsung TVs usually label HDMI ports (HDMI 1, HDMI 2, etc.). Make sure you note which port you use.

    Step 2: Select the Correct HDMI Input on Your Samsung TV

    If the TV is set to the wrong input source, it will show No Signal.

    • Press the Source or Input button on your Samsung remote.
    • Use the remote or on-screen menu to select the HDMI port your device is connected to.
    • If you’re unsure, cycle through all HDMI inputs to find the active one.

    Step 3: Power Cycle Your Devices

    Restarting your devices refreshes connections.

    • Turn off the TV and the connected HDMI device.
    • Unplug both from the power outlet.
    • Wait 30 seconds.
    • Plug them back in and power them on.
    • Select the correct HDMI input on the TV.

    Step 4: Update Samsung Smart TV Software

    Outdated firmware can cause HDMI recognition issues.

    • Press Home on your remote.
    • Go to Settings > Support > Software Update.
    • Select Update Now.
    • If an update is available, download and install it.
    • Restart your TV after the update.

    Step 5: Adjust HDMI UHD Color Settings

    Samsung’s HDMI UHD Color setting can interfere with HDMI signal recognition.

    • Open Settings > General > External Device Manager.
    • Select HDMI UHD Color.
    • Enable UHD Color for the HDMI port your device uses.
    • Restart your TV and device.

    Step 6: Test the HDMI Device on Another TV or Monitor

    To determine if the problem is with the device or TV:

    • Connect the HDMI device to another TV or monitor.
    • If it works, the TV’s HDMI port or settings may be the issue.
    • If it doesn’t, the device or its HDMI output may be faulty.

    Step 7: Reset Samsung Smart TV to Factory Defaults

    If the problem persists, resetting your TV can fix corrupted settings.

    • Go to Settings > General > Reset.
    • Enter your PIN (default is 0000).
    • Confirm to reset.
    • Set up your TV again and test HDMI input.

    Step 8: Additional Troubleshooting Tips

    • Check if any HDMI switchers, splitters, or receivers are causing signal loss; connect the device directly.
    • Clean HDMI ports gently to remove dust.
    • Ensure your HDMI device is powered on and not in standby.
    • Disable Anynet+ (HDMI-CEC) temporarily: Settings > General > External Device Manager > Anynet+ (HDMI-CEC).
    • Try using a different HDMI cable type (e.g., HDMI 2.0 or 2.1) for compatibility.

    My Experience Fixing No Signal on Samsung HDMI

    I faced this issue with a gaming console where the HDMI UHD Color setting was disabled. Enabling it fixed the problem instantly. In other cases, replacing a faulty HDMI cable or switching to a different port worked. Updating the TV’s firmware also resolved compatibility glitches. Restarting both TV and device was the simplest fix most times.

    Conclusion

    Fixing No Signal on Samsung Smart TV HDMI typically involves:

    • Checking and securing HDMI cable connections.
    • Selecting the correct HDMI input on the TV.
    • Restarting devices.
    • Updating TV software.
    • Enabling HDMI UHD Color.
    • Testing hardware on other devices.
    • Resetting TV if needed.

    Following these steps systematically will help restore your HDMI connection quickly and reliably.