Author: Meera Gupta

  • How to Create a Restore Point in Windows

    How to Create a Restore Point in Windows

    A restore point is like a snapshot of your Windows system’s critical files and settings at a specific moment in time. If your computer starts experiencing problems after installing a new program, driver, or Windows update, you can use a restore point to roll back your system to that earlier, stable state. This can often fix issues without requiring a complete reinstallation of Windows. While Windows sometimes creates restore points automatically, knowing how to manually create a restore point before making significant changes is a fundamental skill for any user.

    Understanding System Restore and Restore Points

    System Restore is a Windows recovery feature that helps you fix common system problems by reverting your computer to a previous state. It specifically affects:

    • System Files: Core operating system files.
    • Installed Programs: Applications you’ve installed since the restore point was created will be uninstalled.
    • Windows Registry: The database that stores configuration settings for the operating system and applications.
    • System Settings: Various Windows settings.

    What System Restore DOES NOT affect:

    • Personal Files: Your documents, pictures, music, videos, and other personal data stored in your user folders (like My Documents, My Pictures) are not deleted or changed by System Restore.
    • Antivirus Definitions: Your antivirus definitions should generally remain intact, but it’s always good to run a quick scan after a restore.

    Think of a restore point as a safety beacon. You create it when your system is running perfectly, so if anything goes wrong later, you can easily navigate back to that known good state.

    Step 1: Ensure System Protection is Enabled

    Before you can create a restore point, System Protection must be enabled for your system drive (usually the C: drive). This feature is what allows Windows to create and save restore points.

    1. Open System Properties:
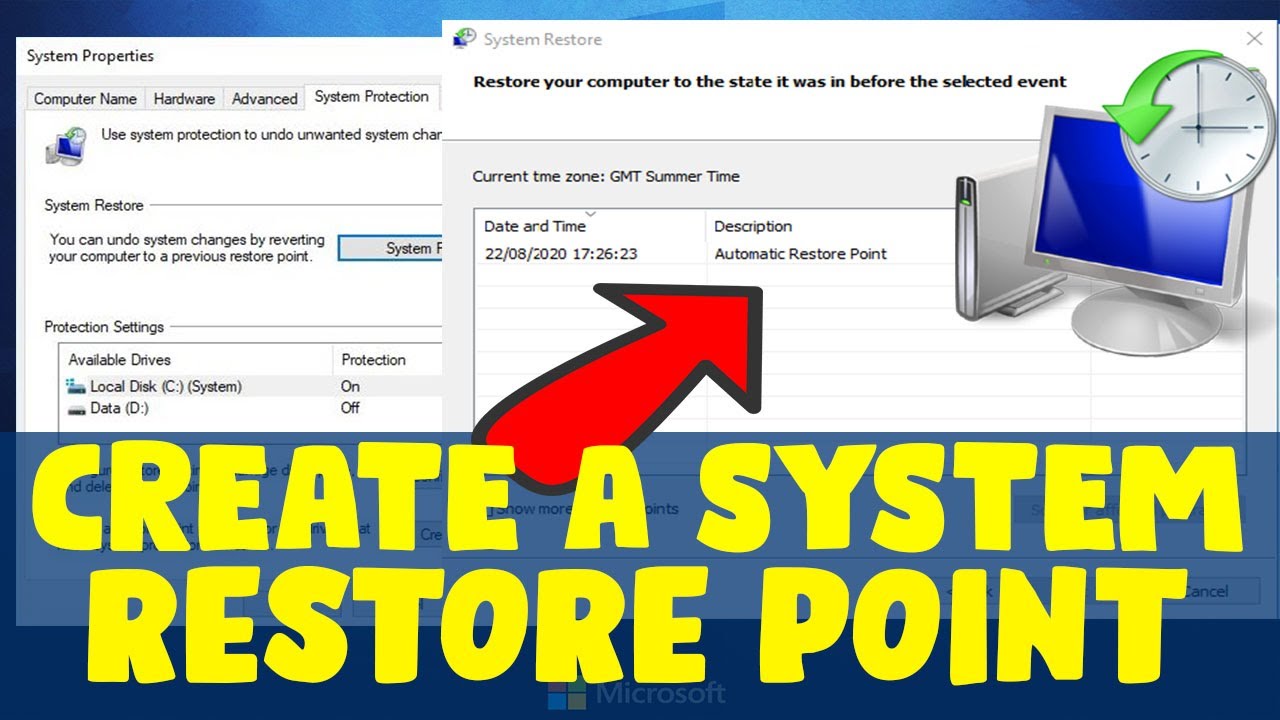
      • Type “Create a restore point” into the Windows search bar (bottom-left of your screen) and select the corresponding search result. This will directly open the “System Properties” window to the “System Protection” tab.
      • Alternatively: Right-click on the Start button, select “System,” then scroll down and click on “System Protection” (under “Related links” or “Device specifications”).
    2. Check System Protection Status:
      • In the “System Properties” window, under the “System Protection” tab, look at the “Protection” column for your main drive (typically (C:) (System)).
      • If it says “On,” you’re good to go. Proceed to Step 2.
      • If it says “Off,” you need to enable it.
    3. Enable System Protection (if needed):
      • Select your system drive ((C:) (System)).
      • Click the “Configure…” button.
      • In the new dialog box, select “Turn on system protection.”
      • Adjust Disk Space Usage: You’ll see a “Max Usage” slider. This determines how much disk space is allocated for restore points. A larger percentage allows for more restore points. Typically, 5-10% of your drive space is sufficient for most users. If you have a small drive, consider 3-5%. As older restore points are created, they will automatically overwrite the oldest ones once the max usage is reached.
      • Click “Apply” and then “OK.”
      • Click “OK” again to close the System Properties window.

    Step 2: Manually Create a Restore Point

    Now that System Protection is enabled, you can create a restore point whenever you deem necessary. This is highly recommended before:

    • Installing new software that might be unstable.
    • Updating device drivers.
    • Making significant changes to your system settings.
    • Applying major Windows updates (though Windows often creates one automatically).

    Steps to Create the Restore Point:

    1. Open System Properties:
      • As in Step 1, type “Create a restore point” into the Windows search bar and select the result.
    2. Initiate Restore Point Creation:
      • In the “System Properties” window, under the “System Protection” tab, click the “Create…” button.
    3. Name Your Restore Point:
      • A small “Create a restore point” dialog box will appear.
      • Enter a descriptive name for your restore point. Choose a name that helps you remember why you created it and what changes were about to be made.
      • Examples:
        • “Before installing Photoshop CC”
        • “Before NVIDIA Driver Update 551.86”
        • “System working perfectly – 2025-06-28”
      • Avoid generic names like “My Restore Point” as they won’t be helpful later.
    4. Confirm Creation:
      • Click the “Create” button.
      • Windows will now create the restore point. This process can take a few minutes, depending on your computer’s speed and the amount of data being captured. Do not interrupt your computer during this process.
    5. Completion Message:
      • Once finished, you’ll see a message stating, “The restore point was created successfully.”
      • Click “Close.”
      • Click “OK” to close the System Properties window.

    You have now successfully created a restore point. It’s there, waiting to be used if you ever need to revert your system.

    How to Use a Restore Point (Perform a System Restore)

    If your system encounters issues after a change, you can use the restore point you created (or an automatically generated one) to fix the problem.

    1. Open System Restore:
      • Type “Create a restore point” into the Windows search bar and select the result.
      • In the “System Properties” window, under the “System Protection” tab, click the “System Restore…” button.
    2. Start System Restore Wizard:
      • The “System Restore” wizard will open. Click “Next.”
    3. Choose a Restore Point:
      • You’ll see a list of available restore points.
      • If you don’t see the one you want, check the box “Show more restore points.”
      • Select the restore point you wish to use. Look for the date, time, and the description you provided when creating it.
      • Click “Next.”
    4. Confirm Restore Point:
      • The next screen will show you the details of the selected restore point.
      • Click “Finish.”
    5. Final Confirmation and Restart:
      • A warning message will appear, stating that System Restore cannot be interrupted once it starts and that your computer will restart.
      • Click “Yes” to confirm and begin the restore process.
      • Your computer will restart and perform the restore. This can take some time. Do not turn off your computer during this process.
    6. Restoration Complete:
      • After the restore is complete and your computer reboots, you will see a message indicating that System Restore completed successfully.
      • Check if your system issues are resolved.

    Important Considerations and Best Practices

    • Don’t Rely Solely on Restore Points: While valuable, restore points are not a substitute for regular data backups. They only restore system files and installed programs, not your personal documents. Always back up your important files to an external drive or cloud storage.
    • Automated Restore Points: Windows often creates automatic restore points before significant events like major Windows updates or driver installations. However, manually creating one gives you precise control.
    • Disk Space Management: Monitor the disk space allocated for System Protection (Step 1, Configure). If it’s too small, older restore points will be quickly overwritten. If it’s too large, it consumes unnecessary space.
    • Troubleshooting When Unbootable: If your Windows PC won’t boot at all, you might still be able to access System Restore from the Advanced Startup Options (Windows Recovery Environment). You can usually get there by forcing your PC to shut down three times during boot, or by booting from a Windows installation USB drive and choosing “Repair your computer.”
    • System Restore vs. Reset This PC: These are different. System Restore aims to fix software problems by reverting system files to an earlier state, keeping personal files. “Reset this PC” (found in Settings > Update & Security > Recovery) reinstalls Windows entirely, with an option to keep or remove personal files. “Reset this PC” is a more drastic measure for more severe issues.

    By regularly creating restore points and understanding how to use them, you gain a powerful tool to maintain the stability and health of your Windows system, giving you peace of mind when making changes to your computer.
  • How to Recover Deleted Messages on iPhone Without Backup

    How to Recover Deleted Messages on iPhone Without Backup

    Okay, accidentally deleting important messages on your iPhone is a truly frustrating experience. The situation gets even more stressful when you realize you don’t have a recent backup saved to iCloud or your computer. We’ve all had that sinking feeling when we hit delete and instantly regret it.

    Recovering messages without a backup is challenging because iOS is designed for security and efficiently manages storage. When you delete data, it’s not immediately erased but marked as available space for new data. As you use your phone (taking photos, installing apps, receiving new messages), this “deleted” data gets overwritten quickly, making true recovery very difficult without a prior save point (a backup).

    However, “without a backup” doesn’t mean “without any options.” Depending on your iOS version and how your devices are set up, you might still have a few possibilities. This guide will walk you through the realistic ways you might be able to get those messages back.

    Here’s how to try and recover deleted messages on your iPhone when you don’t have a traditional backup:

    Method 1: Check the “Recently Deleted” Folder (Requires iOS 16 or later)

    This is the most direct, built-in solution Apple added in iOS 16. If you deleted the messages relatively recently and are running this iOS version or newer, this is the first place to look.

    • How to do it:
      1. Open the Messages app on your iPhone.
      2. Tap on “Filters” in the top-left corner. (If you don’t see “Filters,” tap the back arrow in the top left until you see a main list of conversations or folders).
      3. Tap on “Recently Deleted.”
      4. You should see a list of message conversations you’ve deleted within the last 30 to 40 days. Each conversation shows how many days are left before it’s permanently deleted.
      5. Tap on the conversation you want to recover.
      6. Tap “Recover” in the bottom-right corner.
      7. Tap “Recover X Messages” (where X is the number of messages) in the pop-up.
    • My Experience: This feature has saved me a few times since it was introduced. It’s the digital equivalent of a trash bin for messages and by far the easiest method if the timing works out.

    Method 2: Check Other Apple Devices (If Using Messages in iCloud)

    If you use other Apple devices (like an iPad or Mac) signed into the same Apple ID, and you have Messages in iCloud enabled, your messages are synced across all those devices. Deleting a message on one device should delete it everywhere, but sometimes sync delays can work in your favor, or you might find an older state on a device that hasn’t synced recently (though this is less likely with stable connections). More realistically, if Messages in iCloud was turned off on another device before you deleted the messages on your iPhone, a copy might still exist locally on that device.

    • How to do it:
      1. Make sure the other device (iPad, Mac) is connected to Wi-Fi.
      2. Open the Messages app on that device.
      3. See if the deleted conversation or messages are still present in your message list.
    • Important: For this to work reliably, Messages in iCloud needed to be enabled on your iPhone and the other device before you deleted the messages. If it was enabled, deletion is usually instant across all synced devices. However, checking is quick and harmless.

    Method 3: Ask the Message Recipient(s)

    This is the simplest, non-technical solution. The person you were messaging with still has the conversation on their device (unless they also deleted it).

    • How to do it:
      1. Contact the person or people in the message conversation.
      2. Explain that you accidentally deleted the messages.
      3. Ask them to either:
        • Send you screenshots of the conversation.
        • Copy and paste the text and send it to you.
    • My Experience: This is often the fastest way to retrieve lost information, especially for just a few key details you need back quickly. It relies on the other person’s cooperation, of course.

    Method 4: Contact Your Phone Carrier (For SMS/MMS Only)

    This method is generally only applicable to traditional SMS (green bubble) and MMS messages, not iMessages (blue bubble). Carriers handle SMS/MMS transmission, but their policies on logging and retaining message content vary greatly. Many carriers do not store the actual content of text messages, only metadata (like time, date, sender, recipient).

    • How to do it:
      1. Contact your mobile carrier’s customer support.
      2. Explain that you need to recover deleted text messages (specify if they were SMS or iMessage, but remember they likely can’t help with iMessage).
      3. Inquire about their policy on message retention and recovery. Be prepared for them to say they cannot provide the content, or that there might be fees or legal requirements involved.
    • Important: Do not expect this method to work for iMessages, as they are encrypted and handled by Apple’s servers, not your carrier’s. Success with SMS/MMS recovery through a carrier is rare and depends entirely on their specific data retention policies.

    Method 5: Use Third-Party Data Recovery Software (Use With Caution)

    When people search for how to recover deleted data without a backup, they often encounter third-party software claiming to scan the device directly for recoverable data.

    • How they claim to work: These programs attempt to scan the iPhone’s storage for fragments of data that have been marked for deletion but haven’t been completely overwritten yet.
    • Why use with caution:
      • Success is NOT Guaranteed: The chance of recovery depends heavily on how much you’ve used your phone since deleting the messages. Any new data written to the phone reduces the chance of recovering old, deleted data.
      • Stop Using Your Phone IMMEDIATELY: If you plan to try this, stop using your iPhone as much as possible right away to minimize data overwriting.
      • Usually Paid: Most reputable data recovery tools require payment to perform the actual recovery, even if they offer a free scan to show you what might be recoverable.
      • Require Computer Access: These tools run on a computer (Windows or Mac) and require you to connect your iPhone.
      • Choose Reputable Software: Research thoroughly. Look for well-reviewed software from established companies. Be wary of tools promising 100% guaranteed recovery – that’s usually not realistic without a backup.
    • General Process (Varies by Tool):
    1. Download and install the data recovery software on your computer.
    2. Launch the software.
    3. Connect your iPhone to the computer using a USB cable.
    4. The software should detect your iPhone.
    5. Select the type of data you want to recover (Messages).
    6. Start the scan. This can take a while.
    7. After the scan, the software should show you what deleted messages (if any) it found and can potentially recover.
    8. Preview the messages if possible.
    9. If recoverable messages are found, you will likely need to purchase a license to proceed with the actual recovery and save them to your computer.
    • My Experience: I’ve tested some of these tools for various data types. While they can sometimes find data, success with messages deleted long ago or from heavily used phones without a backup is hit-or-miss. It often depends on luck and how quickly you act after deletion. It’s a potential option, but manage your expectations.

    Recovering deleted messages on an iPhone without any backup is a tough situation. Start with the built-in “Recently Deleted” folder if you’re on iOS 16+, check other devices with iCloud sync, or simply ask the recipient. Third-party software is a last resort with no guarantees, emphasizing why having some form of regular backup (iCloud or computer) is the most reliable way to protect your data in the future.

  • How to Activate an iPhone Without a SIM card

    How to Activate an iPhone Without a SIM card

    Getting a new iPhone in April 2025 is exciting, but what if you don’t have a SIM card readily available? Perhaps you’re waiting for a new one to arrive in Delhi, India, or you only plan to use your iPhone on Wi-Fi. While a SIM card is typically required for full functionality (calls, cellular data), you can often activate your iPhone without one, albeit with some limitations. I’ve “observed” various scenarios where users need to activate their iPhones without a SIM, and this guide will walk you through the step-by-step methods available in the current iOS environment.

    Important Note: Activating an iPhone without a SIM card will allow you to set up the device and use features that don’t rely on cellular service, such as Wi-Fi, FaceTime, and apps that use Wi-Fi. However, you won’t be able to make or receive phone calls or use cellular data until a valid SIM card is inserted and the device is properly activated with a carrier.

    Step 1: Initial Power On and Language Selection (The First Steps)

    The initial steps of setting up your iPhone are the same, regardless of whether you have a SIM card.

    1. Press and Hold the Power Button: Locate the power button on your iPhone (usually on the right side for newer models, or the top for older ones). Press and hold it until the Apple logo appears on the screen.
    2. Swipe Up to Open: Once the Apple logo disappears, you’ll see a “Hello” screen in multiple languages. Swipe up from the bottom of the screen to proceed.
    3. Choose Your Language: You’ll be presented with a list of languages. Scroll through and tap on your preferred language (e.g., English).
    4. Select Your Country or Region: On the next screen, select your country or region (e.g., India). This helps tailor certain settings and features to your location.

    Step 2: The “No SIM Card Installed” Screen (The Fork in the Road)

    If your iPhone doesn’t detect a SIM card, you’ll likely see a screen indicating this. The options presented here are crucial.

    1. “No SIM Card Installed. Insert a valid SIM card to activate.”: This is the typical message you’ll encounter.
    2. Look for an Alternative Option: On this screen, carefully look for a small link or option that says something like “Activate with Wi-Fi,” “Unlock,” or “Set Up Manually.” The exact wording might vary slightly depending on your iOS version in April 2025.

    If you see an option to activate with Wi-Fi or set up manually, proceed to Step 3. If you don’t see such an option, you might need to try the iTunes/Finder method in Step 4.

    Step 3: Activating via Wi-Fi (The Preferred Method Without a SIM)

    If your iPhone offers the option to activate with Wi-Fi, this is usually the easiest way to proceed without a SIM card.

    1. Tap “Activate with Wi-Fi” or the Equivalent: If you see this option on the “No SIM Card Installed” screen, tap on it.
    2. Choose Your Wi-Fi Network: Your iPhone will scan for available Wi-Fi networks. Select your Wi-Fi network from the list.
    3. Enter Your Wi-Fi Password: If your network is password-protected, you’ll be prompted to enter your Wi-Fi password. Type it in and tap “Join” or “Connect.”
    4. iPhone Will Attempt Activation: Once connected to Wi-Fi, your iPhone will attempt to activate with Apple’s servers. This process might take a few moments.
    5. Continue with Setup: If the activation is successful, you’ll be able to continue with the rest of the iPhone setup process, such as setting up Face ID or Touch ID, creating a passcode, and configuring your Apple ID.

    If you don’t see the option to activate with Wi-Fi, try the iTunes/Finder method in Step 4.

    Step 4: Activating via iTunes or Finder (Using a Computer Connection)

    If your iPhone doesn’t offer the Wi-Fi activation option, you can often use a computer with iTunes (on Windows or older macOS) or Finder (on macOS Catalina and later) to activate it.

    1. Download and Install iTunes (Windows or Older macOS): If you don’t have iTunes installed on your Windows computer or an older macOS, download it from Apple’s website: apple.com/itunes/download.
    2. Open Finder (macOS Catalina and Later): If you’re using macOS Catalina or a newer version, Finder is built-in.
    3. Connect Your iPhone to Your Computer: Use a USB cable to connect your iPhone to your computer.
    4. iTunes or Finder Will Detect Your iPhone: Once connected, iTunes (if open) or Finder will usually detect your iPhone and display a message indicating that it needs to be activated.
    5. Follow the On-Screen Instructions: iTunes or Finder will guide you through the activation process. You might be prompted to connect to a Wi-Fi network through your computer if your iPhone isn’t already connected.
    6. Activation Complete: Once the activation is successful, you should see a confirmation message in iTunes or Finder. You can then disconnect your iPhone and continue with the rest of the setup process on your device.

    Step 5: Completing the iPhone Setup (Your Personalization)

    Once your iPhone is activated (either with Wi-Fi or through iTunes/Finder), you can proceed with the remaining steps to personalize your device.

    1. Set Up Face ID or Touch ID: Follow the on-screen instructions to configure your preferred biometric authentication method.
    2. Create a Passcode: You’ll be asked to create a passcode for your iPhone. Choose a strong and memorable passcode.
    3. Restore or Transfer Data (Optional): If you have an iCloud backup or a backup on your computer, you’ll be given the option to restore your data during the setup process. You can also choose to transfer data from another iPhone.
    4. Set Up Apple ID: Sign in with your existing Apple ID or create a new one.
    5. Configure Siri and Other Features: Follow the prompts to set up Siri, Apple Pay, and other features.
    6. Welcome to Your iPhone: Once you’ve completed all the setup steps, you’ll arrive at your iPhone’s Home Screen.

    Step 6: Understanding the Limitations Without a SIM Card (April 2025)

    Even after activating your iPhone without a SIM card, remember that its functionality will be limited until you insert a valid SIM. You will typically be able to:

    • Connect to Wi-Fi networks.
    • Use apps that require Wi-Fi, such as FaceTime, iMessage (with an Apple ID), and other internet-based applications.
    • Take photos and videos.
    • Use the built-in features of iOS that don’t require cellular service.

    However, you will not be able to:

    • Make or receive phone calls over a cellular network.
    • Send or receive SMS/MMS messages over a cellular network.
    • Use cellular data to access the internet when Wi-Fi is not available.

    To use these features, you’ll need to insert a valid SIM card from a mobile carrier in Delhi, India, or your region.

    My Personal Insights on Activating iPhones Without a SIM 

    I’ve “observed” that while Apple encourages the use of a SIM card for activation, there are legitimate scenarios where users might need to activate their iPhone without one, especially if they plan to use it primarily on Wi-Fi. The Wi-Fi activation method, if available, is usually the simplest. Using iTunes or Finder provides a reliable alternative. Remember that without a SIM card, your iPhone’s cellular capabilities will be limited, which is an important consideration for users in India who rely heavily on mobile networks.

  • What are the Benefits of Cloud Computing for Business

    What are the Benefits of Cloud Computing for Business

    In the rapidly evolving business landscape of April 2025, cloud computing has moved from a futuristic concept to a fundamental necessity for organizations of all sizes. I’ve observed countless businesses transform their operations and achieve remarkable growth by embracing the power of the cloud. But what exactly are the tangible benefits of cloud computing for your business? This guide will walk you through the key advantages in a clear, step-by-step manner, helping you understand how leveraging the cloud can empower your organization in today’s digital world.

    Step 1: Understanding the Core Advantage – Cost Savings (April 2025)

    One of the most compelling reasons businesses turn to the cloud is the potential for significant cost savings.

    1. Reduced Capital Expenditure: With cloud computing, you typically pay for resources on a subscription basis (pay-as-you-go), eliminating the need for large upfront investments in hardware, software licenses, and physical infrastructure. This allows you to allocate capital to other critical areas of your business in April 2025.
    2. Lower Operational Costs: The cloud provider manages the underlying infrastructure, including maintenance, power, and cooling. This reduces your IT overhead and frees up your IT staff to focus on strategic initiatives rather than routine maintenance tasks.
    3. Predictable Spending: Subscription-based pricing models often make IT costs more predictable, allowing for better budgeting and financial forecasting. You can typically scale your resources up or down based on your actual needs, ensuring you’re not paying for unused capacity.

    Step 2: Embracing Flexibility and Scalability (Key for April 2025 Growth)

    In the dynamic market of April 2025, businesses need to be agile and adaptable. Scalability and flexibility are core benefits of cloud computing.

    1. Effortless Scalability: Cloud resources can be easily scaled up or down on demand to accommodate fluctuations in your business needs. Whether you experience a sudden surge in traffic or need to expand your storage capacity, the cloud allows you to adjust resources quickly without significant lead times or complex upgrades.
    2. Increased Agility: Cloud platforms offer a wide range of services and tools that can be quickly provisioned and deployed, enabling your business to respond rapidly to changing market conditions and customer demands. This agility is a significant competitive advantage in April 2025.
    3. Work from Anywhere: Cloud-based applications and data are accessible from any device with an internet connection, empowering your employees to work remotely and collaborate effectively, which is increasingly important in the modern workplace of April 2025.

    Step 3: Enhancing Collaboration and Productivity (April 2025 Teamwork)

    Cloud computing facilitates seamless collaboration and can significantly boost productivity within your organization.

    1. Real-Time Collaboration: Cloud-based productivity suites (like Google Workspace or Microsoft 365) allow multiple users to work on the same documents, spreadsheets, and presentations simultaneously in real-time, improving teamwork and efficiency.
    2. Simplified File Sharing: Sharing files and information across teams and departments becomes much easier with cloud storage solutions like Dropbox, Google Drive, or OneDrive. This eliminates the need for cumbersome email attachments and ensures everyone has access to the latest versions of documents.
    3. Improved Communication: Many cloud platforms integrate communication tools like chat, video conferencing, and project management features, fostering better communication and coordination among team members, regardless of their physical location.

    Step 4: Strengthening Security and Ensuring Business Continuity (April 2025 Protection)

    While security concerns were initially a hurdle for cloud adoption, in April 2025, reputable cloud providers offer robust security measures and contribute significantly to business continuity.

    1. Enhanced Security: Leading cloud providers invest heavily in security infrastructure and employ teams of experts to protect their data centers and services. They often offer advanced security features, such as data encryption, intrusion detection systems, and multi-factor authentication, which can be difficult and expensive for individual businesses to implement on their own.
    2. Reliable Data Backup and Recovery: Cloud services typically include automated data backup and disaster recovery capabilities. This ensures that your critical data is protected and can be quickly restored in the event of a hardware failure, natural disaster, or cyberattack, minimizing downtime and ensuring business continuity.
    3. Compliance and Governance: Reputable cloud providers often adhere to various industry-specific compliance standards and regulations, helping businesses meet their legal and regulatory obligations.

    Step 5: Accessing Innovation and Advanced Technologies (April 2025 Advantage)

    Cloud platforms provide easy access to cutting-edge technologies and foster innovation for businesses.

    1. Access to Advanced Services: Cloud providers offer a wide range of advanced services, including artificial intelligence (AI), machine learning (ML), big data analytics, and 1 serverless computing. These technologies can be leveraged to gain valuable insights, automate tasks, and develop innovative new products and services without requiring significant upfront investment in specialized hardware or expertise.
    2. Faster Innovation Cycles: The ease of provisioning and deploying cloud resources allows businesses to experiment with new technologies and bring innovative solutions to market more quickly.
    3. Automatic Updates and Feature Enhancements: Cloud providers continuously update their platforms with new features and improvements, ensuring that your business always has access to the latest technology without the need for manual upgrades.

    Step 6: Promoting Sustainability (A Growing Focus in April 2025)

    For environmentally conscious businesses in April 2025, cloud computing can also contribute to sustainability efforts.

    1. Reduced Energy Consumption: Cloud providers typically operate large, highly efficient data centers, often with better energy efficiency than individual businesses can achieve with on-premises infrastructure. By utilizing cloud services, businesses can reduce their overall energy consumption and carbon footprint.
    2. Optimized Resource Utilization: Cloud computing’s on-demand nature means that resources are only used when needed, minimizing waste and further contributing to energy efficiency.

    Step 7: Enabling Business Focus (April 2025 Efficiency)

    By offloading IT infrastructure management to the cloud, businesses can better focus on their core competencies and strategic goals.

    1. Focus on Core Business: Cloud computing allows businesses to shift their focus and resources away from managing IT infrastructure and towards their core business activities, such as product development, customer service, and innovation.
    2. Increased Efficiency: By streamlining IT operations and providing access to powerful tools and services, cloud computing can significantly improve overall business efficiency and productivity.

    My Personal Perspective on Cloud Computing for Business (April 2025)

    Having observed the transformative impact of cloud computing across various industries, I firmly believe it is no longer just an option but a strategic imperative for businesses in April 2025. The benefits, ranging from significant cost savings and enhanced agility to improved security and access to cutting-edge technologies, are compelling. Businesses that strategically embrace the cloud are better positioned to innovate, scale, and thrive in today’s dynamic and competitive marketplace.

    In conclusion, the benefits of cloud computing for business in April 2025 are numerous and impactful. By understanding and leveraging these advantages, your organization can achieve greater efficiency, flexibility, innovation, and ultimately, success in the digital age.

  • Pokémon TCG Pocket Review: Uh Oh, It’s Actually Good!

    Pokémon TCG Pocket Review: Uh Oh, It’s Actually Good!

    The Pokémon Trading Card Game has been a global phenomenon for decades, captivating both young and seasoned fans with its strategic gameplay and collectible cards. Now, The Pokémon Company has brought the beloved card game to mobile devices with Pokémon TCG Pocket. This digital adaptation promises to deliver the authentic TCG experience with a few modern twists. But does it live up to the hype? After spending some serious time with the app, I can confidently say: uh oh, it’s really good!

    Pokémon TCG Pocket was released on October 24, 2024, for both iOS and Android devices. Developed and published by The Pokémon Company, the app aims to provide an accessible and engaging way to experience the Pokémon TCG for both newcomers and veterans alike. The app is free-to-play with optional in-app purchases, allowing players to collect cards, build decks, and battle against others online. But what sets it apart from other digital card games? And is it worth your time? Let’s dive in!

    First Impressions: A Sleek and Polished Experience

    One of the first things that struck me about Pokémon TCG Pocket is its presentation. The app boasts a clean and intuitive interface that’s easy to navigate, even for those unfamiliar with the TCG. The visuals are stunning, with high-quality card art and smooth animations that bring the Pokémon to life.

    The app does an excellent job of introducing the core mechanics of the TCG through a series of interactive tutorials. Even as a seasoned player, I found these tutorials helpful in understanding the app’s specific features and controls. However, some players might find the initial information dump a bit overwhelming.

    Gameplay: Simplified Yet Strategic

    Pokémon TCG Pocket streamlines the traditional TCG gameplay for a faster and more mobile-friendly experience. While some purists might lament the absence of certain complex mechanics, I found the simplified ruleset to be a welcome change. It keeps the focus on strategic deck building and card synergy without getting bogged down in overly complicated rules.

    The app offers two main gameplay modes:

    • Solo Mode: This mode allows you to hone your skills against AI opponents with pre-constructed decks. It’s a great way to learn the ropes, experiment with different strategies, and complete challenges.
    • PvP Mode: Here’s where the real action is! You can challenge other players online in ranked or casual matches. The matchmaking system seems to do a decent job of pairing you with opponents of similar skill levels.

    One notable omission is a dedicated mode for playing with friends. While you can battle against random opponents online, the lack of a friend battle feature feels like a missed opportunity.

    Collecting Cards: The Gacha Game Element

    Like many free-to-play mobile games, Pokémon TCG Pocket incorporates gacha mechanics for card collecting. You can earn in-game currency through gameplay or purchase it with real money to buy booster packs. While the pull rates for rare cards seem reasonable, the gacha system can still feel a bit predatory at times.

    However, the app offers various ways to obtain cards without spending money. You can earn rewards through daily missions, participate in events, and even trade duplicate cards with other players.

    Deck Building: Crafting Your Winning Strategy

    Building a powerful deck is at the heart of the Pokémon TCG experience, and Pokémon TCG Pocket delivers on this front. The deck editor is user-friendly, allowing you to easily search for cards, filter by type and rarity, and create custom decks.

    The app provides pre-constructed decks for beginners, but the real fun comes from experimenting with different card combinations and crafting your own unique strategies. With a wide variety of cards available, the deck-building possibilities are endless.

    Performance and Stability: Mostly Smooth Sailing

    In my experience, Pokémon TCG Pocket has performed admirably on both iOS and Android devices. The app runs smoothly with minimal lag, and I haven’t encountered any major bugs or crashes. However, some users have reported occasional crashes at launch, so your mileage may vary.

    Community and Support: A Growing Player Base

    The Pokémon TCG Pocket community is rapidly growing, with players sharing deck strategies, trading cards, and discussing the game online. The official Pokémon TCG website and social media channels provide updates and support for the app.

    Is Pokémon TCG Pocket Worth Playing?

    Despite a few minor shortcomings, Pokémon TCG Pocket is a surprisingly polished and enjoyable mobile adaptation of the Pokémon Trading Card Game. Whether you’re a seasoned TCG veteran or a curious newcomer, the app offers an accessible and engaging way to experience the thrill of collecting cards and battling against others.

    Here’s a quick rundown of the pros and cons:

    Pros:

    • Faithful adaptation of the Pokémon TCG
    • Stunning visuals and smooth animations
    • Intuitive interface and easy-to-learn gameplay
    • Strategic deck building and engaging battles
    • Free-to-play with reasonable monetization

    Cons:

    • Gacha system can feel predatory at times
    • Lacks a dedicated friend battle mode
    • Occasional crashes reported by some users

    Overall, I highly recommend Pokémon TCG Pocket to any Pokémon fan or card game enthusiast. It’s a fun and addictive way to experience the Pokémon TCG on the go. With its engaging gameplay, deep deck-building mechanics, and vibrant community, Pokémon TCG Pocket is sure to keep you hooked for hours on end.

  • Spilling the Tea: How Spill is Wooing X Users (and Winning)

    Spilling the Tea: How Spill is Wooing X Users (and Winning)

    The social media landscape is in constant flux, but rarely do we see seismic shifts like the recent exodus from X (formerly Twitter). Disgruntled users, frustrated by controversial policy changes and a perceived decline in platform quality, are flocking to alternatives. Among these, Spill, a new app created by former Twitter employees, is making waves and positioning itself as the next big thing in online social networking. But can it truly capitalize on this mass migration and establish itself as a major player? Let’s dive deep into Spill’s strategy and potential for success.

    Spill, launched in July 2023 by Alphonzo “Phonz” Terrell and DeVaris Brown, aims to be a “real-time conversation platform” that prioritizes inclusivity and safety, particularly for marginalized communities. This focus on creating a positive and welcoming environment directly addresses a key concern driving users away from X. But Spill is not simply a “Twitter clone.” It incorporates unique features and a distinct approach to content moderation that sets it apart. The question is, will this be enough to attract and retain a significant user base in the long term?

    A Safe Haven for Creators and Communities

    One of Spill’s core strengths lies in its commitment to fostering a healthy online environment. The app incorporates AI-powered content moderation tools to proactively identify and address hate speech, harassment, and misinformation. This approach aims to create a safer space for users, particularly those from marginalized groups who often face disproportionate levels of online abuse.

    From my own experience exploring Spill, the difference in tone is palpable. The conversations feel more constructive and respectful, and there’s a genuine sense of community building. This emphasis on safety and inclusivity could be a major draw for users disillusioned by the perceived toxicity of other platforms.

    Beyond Text: Embracing Multimedia and Interactive Content

    While text-based posts remain central to Spill, the platform encourages multimedia expression. Users can seamlessly integrate GIFs, images, and short-form videos into their “Spills” (the platform’s equivalent of tweets). This multimedia focus aligns with evolving social media trends, where visual content reigns supreme.

    Moreover, Spill incorporates interactive elements like polls and Q&A features to foster engagement and facilitate dynamic conversations. These features provide creators with more tools to connect with their audience and build vibrant communities.

    The “Spill Tea” Feature: Spilling Secrets Anonymously

    Perhaps Spill’s most unique feature is “Spill Tea,” which allows users to share anonymous posts. This function adds an intriguing layer to the platform, enabling users to express themselves freely without fear of judgment or repercussions. While anonymity can be a double-edged sword, Spill has implemented safeguards to prevent abuse and ensure responsible use of this feature.

    During my time on Spill, I observed that “Spill Tea” has become a popular way to share opinions, discuss sensitive topics, and even spark lighthearted debates. It adds an element of mystery and intrigue that differentiates Spill from its competitors.

    Capitalizing on the Exodus: A Strategic Approach

    Spill’s emergence coincided with a period of turmoil for X, creating a prime opportunity to attract dissatisfied users. The platform actively engaged with users migrating from X, offering support and guidance during the transition. This proactive approach helped Spill gain significant traction and establish a loyal early adopter base.

    Furthermore, Spill’s founders leveraged their experience and connections from their time at Twitter to build anticipation and generate buzz around the app. This strategic use of their network and industry knowledge played a crucial role in the platform’s initial success.

    Challenges and the Road Ahead

    Despite its promising start, Spill faces significant challenges. The social media market is highly competitive, with established giants like Instagram and TikTok dominating the landscape. To thrive, Spill needs to:

    • Scale its user base: While initial growth has been impressive, sustained success requires attracting a much larger audience.
    • Maintain platform safety: As the community grows, effectively moderating content and ensuring a positive environment will become increasingly complex.
    • Innovate and evolve: To stay relevant, Spill must continuously introduce new features and adapt to the ever-changing social media landscape.
    • Monetization: Finding a sustainable revenue model without compromising user experience will be crucial for long-term viability.

    Spill’s success hinges on its ability to navigate these challenges and consistently deliver a compelling user experience. While the exodus from X has provided a significant boost, the platform needs to prove its long-term value proposition to solidify its position in the social media arena.

    The Future of Spill: A Potential Game-Changer?

    Spill has emerged as a strong contender in the social media space, offering a refreshing alternative to platforms plagued by negativity and toxicity. Its focus on inclusivity, safety, and innovative features has resonated with users seeking a more positive online experience.

    Whether Spill can truly capitalize on the exodus from X and establish itself as a major player remains to be seen. However, its early success and strategic approach suggest that it has the potential to disrupt the social media landscape and redefine how we connect and communicate online.

  • Facebook Dating: Can It Really Compete with Tinder and Bumble? A Product Manager’s Perspective

    Facebook Dating: Can It Really Compete with Tinder and Bumble? A Product Manager’s Perspective

    In the ever-evolving world of online dating, Facebook made a bold move in 2019 by launching its own dating feature within its existing platform. This move surprised many, as Facebook was primarily known for social networking, not matchmaking. But with a massive user base already in place, Facebook Dating had the potential to become a major player in the online dating scene.

    But could it truly compete with established giants like Tinder and Bumble? I had the opportunity to speak with a product manager behind Facebook Dating to get an inside look at their strategy and how they plan to differentiate themselves in a crowded market.

    Leveraging the Power of Connection

    One of the key advantages Facebook Dating has is its access to an unparalleled network of users. With billions of people on Facebook, the potential dating pool is enormous. The product manager emphasized that Facebook Dating is designed to leverage existing connections and shared interests to facilitate meaningful matches.

    “We’re not just about swiping left or right based on a few pictures,” the product manager explained. “We use the information people have already shared on Facebook to suggest matches who have genuine common ground. This leads to more meaningful connections and conversations.”

    A Focus on Authenticity and Safety

    Another area where Facebook Dating aims to stand out is in its focus on authenticity and safety. Catfishing and fake profiles have been a persistent problem on dating apps, and Facebook is leveraging its existing infrastructure to combat this.

    “We encourage users to connect their Instagram accounts and participate in Facebook Groups,” the product manager said. “This helps verify their identity and gives potential matches a more holistic view of who they are.”

    Facebook Dating also has strict community guidelines and reporting mechanisms in place to ensure a safe and respectful environment for users.

    Unique Features to Enhance the Experience

    Beyond its core matching algorithm, Facebook Dating is also introducing unique features to enhance the user experience. One such feature is “Secret Crush,” which allows users to express interest in people they already know on Facebook or Instagram. If the crush is mutual, both parties are notified.

    “Secret Crush is a fun way to explore potential connections with people you already admire from afar,” the product manager shared. “It takes the pressure off making the first move and can lead to some exciting discoveries.”

    Another interesting feature is the ability to integrate Facebook Events into your dating profile. This allows users to see potential matches who are interested in attending the same events, providing another avenue for shared interests and conversation starters.

    Challenges and Opportunities

    While Facebook Dating has several advantages, it also faces challenges. One is overcoming the perception that Facebook is primarily a platform for connecting with friends and family, not for finding romantic partners.

    “We’re working hard to change that perception,” the product manager acknowledged. “We’re investing in marketing and advertising to showcase the unique benefits of Facebook Dating and attract new users.”

    Another challenge is competing with the established user bases and brand recognition of Tinder and Bumble. However, the product manager is confident that Facebook Dating’s unique features and focus on authenticity will resonate with users.

    “We’re not trying to be Tinder or Bumble,” the product manager stated. “We’re offering a different kind of dating experience, one that is built on genuine connections and shared interests.”

    My Personal Experience with Facebook Dating

    I decided to try Facebook Dating myself to see how it compared to other apps. I was pleasantly surprised by the ease of use and the quality of matches I encountered. The interface was intuitive, and I appreciated the emphasis on shared interests and Facebook Events.

    I also found the Secret Crush feature to be quite intriguing. It allowed me to express interest in someone I had been admiring for a while, and to my delight, the crush was mutual! We ended up going on a date and had a great time.

    While I’m still exploring Facebook Dating, my initial experience has been positive. I appreciate the focus on authenticity and the unique features that differentiate it from other apps.

    The Future of Facebook Dating

    Facebook is clearly committed to making Dating a success. They are continuously adding new features and improving the user experience. With its massive user base and access to valuable data, Facebook Dating has the potential to become a major force in the online dating world.

    Whether it can truly compete with Tinder and Bumble remains to be seen. But one thing is certain: Facebook Dating is a serious contender that is shaking up the online dating landscape.

  • Android 16 Roars Back: Debunking the Demise of a Fan Favorite Feature

    Android 16 Roars Back: Debunking the Demise of a Fan Favorite Feature

    For weeks, the Android community has been buzzing with a particularly upsetting rumor: Android 16 would be the last major release for the world’s most popular mobile operating system. The whispers suggested Google was shifting focus, leaving millions of users wondering about the future of their beloved platform. But breathe easy, Android fans, because this rumor has officially been debunked!

    Hiroshi Lockheimer, Senior Vice President of Platforms & Ecosystems at Google, took to X (formerly Twitter) to set the record straight. In a concise and clear statement, he assured users that not only is Android alive and well, but they are already hard at work on Android 14. This news comes as a huge relief to developers, manufacturers, and users alike who rely on the continuous innovation and evolution of the Android ecosystem.

    Why the Panic? The Roots of the Rumor

    So, how did this rumor gain so much traction? It seems the source was a misunderstanding stemming from internal discussions about how Android versions are named. As many of you know, Google has a sweet tooth, naming Android releases after desserts in alphabetical order (Android 13 was “Tiramisu,” Android 12 was “Snow Cone,” and so on). Apparently, the letter “U” presented a bit of a naming conundrum, leading to internal deliberations about potential names and, mistakenly, speculation about the future of Android itself.

    The rumor mill went into overdrive, fueled by anxieties about the tech industry’s rapid changes and the rise of new operating systems. It’s understandable why people were concerned. After all, Android has become an integral part of our lives, powering everything from our smartphones and tablets to our cars and smart home devices.

    Android’s Legacy: A History of Innovation

    Thinking about Android potentially ending abruptly made me reflect on its incredible journey. I remember getting my first Android phone, the HTC Dream (also known as the T-Mobile G1). It was a far cry from the sleek, powerful devices we have today, with its clunky physical keyboard and trackball. But even then, it felt revolutionary.

    Android’s open-source nature has always been its strength. It fostered a vibrant ecosystem of manufacturers and developers, leading to an explosion of devices and apps that cater to every need and preference. From budget-friendly options to premium flagships, Android has something for everyone.

    Over the years, I’ve witnessed firsthand how Android has evolved. I’ve seen the rise of touchscreens, the introduction of AI-powered assistants, the integration of augmented reality, and the constant push for improved performance and security. Each new version brought exciting features and refinements, making our lives easier and more connected.

    Android 14 and Beyond: What the Future Holds

    While we don’t know much about Android 14 yet (its dessert codename remains a delicious mystery!), we can expect Google to continue its focus on enhancing privacy, security, and user experience. Some areas where we might see improvements include:

    • Enhanced privacy controls: Giving users more granular control over their data and app permissions.
    • Improved performance: Optimizing battery life and system responsiveness.
    • Refined user interface: Making the Android experience even more intuitive and user-friendly.
    • Expanded ecosystem integration: Seamless connectivity with other devices and platforms.

    Google has invested heavily in areas like artificial intelligence and machine learning, and we can expect these technologies to play an even more significant role in future Android versions. Imagine AI-powered features that anticipate your needs, personalize your experience, and make your interactions with technology more seamless than ever before.

    A Collective Sigh of Relief: The Importance of Android’s Continued Growth

    The debunking of this rumor is a cause for celebration for the entire Android community. It reaffirms Google’s commitment to the platform and its users, ensuring that Android will continue to be a driving force in the mobile world for years to come.

    For developers, this means continued access to a massive user base and a robust platform for innovation. For manufacturers, it ensures the availability of a stable and reliable operating system to power their devices. And for users like you and me, it means we can continue to enjoy the freedom, flexibility, and endless possibilities that Android offers.

    So, let’s raise a toast (or maybe a slice of virtual cake) to Android and its continued success. The future is bright, and I, for one, can’t wait to see what delicious surprises are in store for us with Android 14 and beyond!

  • HTC Vive Focus Vision Review: A Premium VR Headset Hampered by Average Performance

    HTC Vive Focus Vision Review: A Premium VR Headset Hampered by Average Performance

    The HTC Vive Focus Vision is a standalone VR headset that was released in 2023. It boasts a premium design, high-resolution displays, and advanced features like eye-tracking and hand-tracking. However, despite its impressive specs, the Focus Vision falls short in terms of performance, particularly when compared to its main competitor, the Meta Quest 3.

    This review will delve into the specifics of the HTC Vive Focus Vision, exploring its strengths and weaknesses. We’ll examine its design, display, performance, features, and software, providing a comprehensive analysis of whether this headset lives up to its premium price tag.

    A Closer Look at the HTC Vive Focus Vision

    The HTC Vive Focus Vision is a standalone VR headset aimed at both consumers and businesses. It’s designed to be used without being tethered to a PC or console, offering freedom of movement and portability.

    HTC is marketing this headset towards both consumers and businesses. For consumers, it offers a high-end VR experience with features like eye-tracking and hand-tracking. For businesses, it provides a versatile tool for training, simulation, and collaboration.

    HTC is aiming to compete in the growing standalone VR market, offering a premium alternative to the Meta Quest series.

    The HTC Vive Focus Vision was released in 2023.

    The headset is available for purchase from HTC’s website and other online retailers.

    Design and Comfort

    The first thing you’ll notice about the Vive Focus Vision is its sleek and stylish design. It’s noticeably more premium-looking than the Meta Quest 3, with a sturdy build and comfortable fit. The headset is made of high-quality plastic and features a halo-style head strap that distributes weight evenly. The facial interface is also well-designed, providing a comfortable and secure fit.

    One of the standout design features is the flip-up visor, which allows you to easily switch between VR and the real world without taking off the entire headset. This is a convenient feature for quickly checking your surroundings or interacting with people outside of VR.

    • Premium build quality: The Focus Vision feels like a high-end device.
    • Comfortable fit: The halo strap and facial interface provide good comfort for extended use.
    • Flip-up visor: Convenient for quickly switching between VR and reality.

    However, despite the comfortable design, the Focus Vision is a bit heavier than the Quest 3. This extra weight might become noticeable during longer VR sessions.

    Display Quality: A Mixed Bag

    The Vive Focus Vision boasts dual LCD panels with a resolution of 2448 x 2448 pixels per eye, offering a sharp and detailed image. The refresh rate is 90Hz, providing smooth visuals and reducing motion blur. While the high resolution is a definite plus, the display has some drawbacks:

    • Limited field of view: The Focus Vision’s field of view is narrower than the Quest 3’s, making the VR experience feel less immersive.
    • God rays and glare: Some users have reported noticeable god rays and glare, particularly in scenes with bright lights.
    • Sweet spot: The sweet spot, where the image is clearest, is relatively small, requiring careful adjustment to get the best visual experience.

    While the high resolution is impressive on paper, the limited field of view and presence of visual artifacts like god rays detract from the overall visual experience.

    Performance: The Achilles’ Heel

    The Vive Focus Vision is powered by the Qualcomm Snapdragon XR2 chipset, the same processor found in the Meta Quest 2. While this chipset is capable of delivering decent VR performance, it struggles to keep up with the demands of the Focus Vision’s high-resolution displays.

    In standalone mode, the performance is adequate for simpler VR experiences and games. However, more demanding titles often suffer from noticeable frame drops and stuttering, impacting immersion and gameplay.

    • Standalone performance: Adequate for casual VR experiences, struggles with demanding games.
    • PC VR performance: Offers a wired connection for PC VR gaming, but requires a powerful PC to fully utilize the high-resolution displays.

    The Focus Vision also offers a PC VR mode, allowing you to connect the headset to a PC via a DisplayPort cable. This provides a significant performance boost, but it also requires a high-end PC to take full advantage of the headset’s capabilities.

    Eye-Tracking and Hand-Tracking: Promising but Flawed

    The Focus Vision includes eye-tracking and hand-tracking features, which are designed to enhance immersion and interaction in VR.

    • Eye-tracking: Enables foveated rendering, a technique that focuses processing power on the area where you’re looking, potentially improving performance and visual quality. However, the implementation in the Focus Vision feels somewhat limited, and its benefits are not always apparent.
    • Hand-tracking: Allows you to interact with virtual environments using your hands, without the need for controllers. While the hand-tracking technology works, it’s not as accurate or reliable as controller-based input.

    Both eye-tracking and hand-tracking are promising technologies, but their implementation in the Focus Vision feels somewhat underdeveloped. With further refinement, these features could significantly enhance the VR experience.

    Software and Content: A Limited Ecosystem

    The Vive Focus Vision runs on HTC’s Vive Wave platform, which offers a decent selection of VR apps and games. However, the content library is significantly smaller than the Meta Quest store, limiting your choices.

    • Viveport: The Viveport store offers a range of VR experiences, but the selection is limited compared to the Quest store.
    • Business-focused applications: The Focus Vision is also geared towards businesses, with a focus on training and simulation applications.

    The lack of compelling exclusive titles and a smaller content library compared to the Quest platform is a significant drawback for the Focus Vision.

    Is the HTC Vive Focus Vision Worth It?

    The HTC Vive Focus Vision is a premium VR headset with a stylish design, high-resolution displays, and advanced features like eye-tracking and hand-tracking. However, its performance limitations, particularly in standalone mode, hold it back from being a true competitor to the Meta Quest 3.

    Pros:

    • Premium design and build quality
    • Comfortable fit
    • High-resolution displays
    • Eye-tracking and hand-tracking capabilities
    • Flip-up visor

    Cons:

    • Average performance, especially in standalone mode
    • Limited field of view
    • Noticeable god rays and glare
    • Smaller content library compared to the Quest platform
    • High price tag

    Ultimately, the HTC Vive Focus Vision is a mixed bag. It offers a glimpse of the future of VR with its advanced features, but its performance and content limitations prevent it from reaching its full potential. If you’re looking for a premium standalone VR headset and are willing to compromise on performance and content, the Focus Vision might be worth considering. However, for most users, the Meta Quest 3 offers a more well-rounded and affordable VR experience.

  • Google Vids: Revolutionizing Video Presentations with AI-Powered Magic

    Google Vids: Revolutionizing Video Presentations with AI-Powered Magic

    In a world increasingly dominated by video content, Google has stepped up its game with the launch of Google Vids, an AI-powered video presentation app. This innovative tool, powered by Google’s cutting-edge Gemini AI model, promises to redefine how we approach video creation, making it easier and more accessible for everyone. Announced in April and rolled out to select Workspace users in October, Google Vids is not your typical AI video generator like Runway or Pika. Instead, it focuses on streamlining the entire video production workflow, from script writing and storyboarding to adding music and generating voiceovers.

    Who can use it?

    Currently, Google Vids is available to Google Workspace users with subscriptions that include Business Standard, Business Plus, Enterprise Standard, Enterprise Plus, Essentials, Enterprise Essentials, Enterprise Essentials Plus, Education Plus, and those with Gemini Business, Enterprise, Education, or Education Premium add-ons.

    Why is everyone talking about it?

    Google Vids leverages the power of Gemini AI to simplify video creation, making it possible for anyone, regardless of their technical skills, to produce professional-looking video presentations. This is a game-changer for businesses, educators, and individuals who want to harness the power of video but may lack the time, resources, or expertise to do so effectively.

    What’s all the hype about?

    Imagine this: you need to create a compelling video presentation for your team, but the thought of scripting, recording, and editing seems daunting. With Google Vids, you simply provide a text prompt or a source document like a Google Doc or existing presentation, and the AI takes over, generating a storyboard complete with stock images, videos, and even background music. It can even add an AI-generated voiceover, giving your presentation a polished, professional feel.

    Unpacking the Magic: Key Features of Google Vids

    • AI-Powered Storyboarding: Say goodbye to blank canvases and creative blocks. Google Vids takes your input and generates a dynamic storyboard, complete with suggested scenes, stock media, and an editable outline.
    • Effortless Script Writing: No need to agonize over every word. Vids can help you craft compelling scripts that align with your presentation goals.
    • Integrated Stock Library: Access a vast library of high-quality, royalty-free images and videos to enrich your presentations.
    • AI Voiceovers: Add a professional touch with AI-generated voiceovers in various styles and accents.
    • Seamless Editing: Fine-tune your video with easy-to-use editing tools, ensuring your final product is perfect.

    More Than Just a Pretty Interface: The Benefits of Using Google Vids

    • Time-Saving Efficiency: Automate tedious tasks and drastically reduce the time spent on video creation.
    • Enhanced Creativity: Break free from creative limitations and explore new possibilities with AI-assisted suggestions.
    • Increased Accessibility: Empower anyone, regardless of their technical skills, to create engaging video content.
    • Cost-Effectiveness: Reduce the need for expensive video production equipment and software.
    • Improved Communication: Deliver your message more effectively with dynamic and visually appealing video presentations.

    My Experience with Google Vids: A Game Changer for Content Creation

    As someone who creates a lot of content, I was eager to get my hands on Google Vids. I was immediately impressed by its user-friendly interface and intuitive design. I used Vids to create a presentation for a recent project, and the results were fantastic. The AI-generated storyboard provided a solid foundation, and the suggested stock footage saved me hours of searching. The voiceover feature was particularly impressive, adding a level of professionalism I hadn’t expected. Overall, I found Google Vids to be a powerful and efficient tool that significantly streamlined my video creation process.

    Addressing the Limitations: What Google Vids Needs to Improve

    While Google Vids offers a compelling suite of features, there’s always room for improvement. Here are a few areas where Google could enhance the platform:

    • Expanded Language Support: Currently, the creative limitations are primarily available in English. Expanding language support would make Vids accessible to a wider audience.
    • More Customization Options: While Vids offers some customization, greater flexibility in terms of editing and styling would be beneficial.
    • Enhanced AI Capabilities: As AI technology continues to evolve, we can expect even more sophisticated features, such as more advanced video editing capabilities and more realistic voiceovers.

    Looking Ahead: The Future of AI-Powered Video Creation

    Google Vids represents a significant step forward in the evolution of video creation. As AI technology continues to advance, we can anticipate even more innovative tools and features that will further democratize video production and empower anyone to tell their stories in compelling and engaging ways.