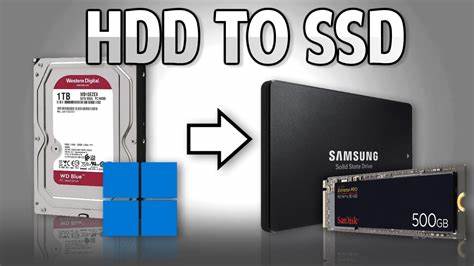
Many modern Windows PCs utilize a combination of storage drives: a fast Solid State Drive (SSD) for the operating system and frequently used applications, and a larger, more affordable Hard Disk Drive (HDD) for bulk storage. This setup offers the best of both worlds – speed and capacity. However, SSDs typically have less storage, so knowing how to move files from SSD to HDD in Windows is essential to keep your SSD lean for optimal performance while storing large files on your HDD.
This guide will cover various methods, from simple drag-and-drop to moving entire user folders and even installed applications, helping you optimize your storage strategy.
Why Move Files from SSD to HDD?
- Optimize SSD Performance: SSDs perform best when they have a significant amount of free space. Moving large, less frequently accessed files off the SSD helps maintain its speed and longevity.
- Increase SSD Storage: Freeing up space on your SSD allows you to install more essential applications that benefit from its speed.
- Efficient Storage Management: Use the fast SSD for your operating system and primary applications, and the high-capacity, cost-effective HDD for media, documents, and games.
- Backup Strategy: Separating frequently accessed system files from large data files can simplify backup procedures for your personal data.
Essential Preparations
Before you start moving files, ensure the following:
- Identify Drives: Know which drive is your SSD (usually C:) and which is your HDD (often D:, E:, or F:). You can check this in File Explorer or Disk Management.
- Sufficient HDD Space: Ensure your HDD has enough free space to accommodate the files you plan to move.
- Close Programs: Close any programs or files that you intend to move. This prevents “file in use” errors.
- Backup Important Files: While moving files is generally safe, it’s always a good practice to back up critical data, especially if you’re moving entire user folders or application directories.
- Understand File Types:
- Keep on SSD: Operating system files, frequently used applications (browsers, office suites, photo editors), and current projects you’re actively working on.
- Move to HDD: Large media files (photos, videos, music), older documents, downloaded files, archived projects, and games you don’t play often.
Method 1: Manual Drag-and-Drop / Cut and Paste (For Individual Files/Folders)
This is the simplest method for moving non-system files and is ideal for photos, videos, documents, and other general data.
Step-by-Step:
- Open Two File Explorer Windows:
- Press Win + E to open File Explorer.
- Open a second File Explorer window (e.g., by right-clicking the File Explorer icon on the taskbar and selecting “File Explorer” again).
- Navigate to Source and Destination:
- In one window, navigate to the folder on your SSD (e.g., C:\Users\YourName\Pictures) where the files you want to move are located.
- In the second window, navigate to the destination folder on your HDD (e.g., D:\My Photos). If the destination folder doesn’t exist, create it.
- Select Files/Folders to Move:
- Click on individual files/folders, or hold Ctrl to select multiple non-contiguous items.
- Hold Shift and click to select a contiguous group.
- Press Ctrl + A to select all items in the current folder.
- Move Files:
- Drag-and-Drop (Recommended for moving): Drag the selected files/folders from the SSD window to the HDD window. When dragging between different drives, Windows defaults to moving the files (cutting them from the source).
- Cut and Paste: Alternatively, right-click on the selected files/folders on the SSD, choose “Cut” (or press Ctrl + X). Then, go to the HDD window, right-click in the destination folder, and choose “Paste” (or press Ctrl + V).
- Verify Transfer: After the transfer is complete, check the destination folder on your HDD to ensure all files have moved correctly. Also, verify they are no longer on your SSD (if you used Cut/Drag-and-Drop).
Method 2: Changing Default Save Locations (For Future Files)
Windows allows you to change where new documents, music, pictures, and videos are saved by default. This doesn’t move existing files but ensures new ones go to your HDD.
Step-by-Step (Windows 11):
- Open Settings: Click Start > Settings > System > Storage.
- Change Where New Content is Saved: Scroll down and click on “Advanced storage settings”, then select “Where new content is saved.”
- Select HDD for Each Category:
- For “New documents will save to,” “New music will save to,” “New photos and videos will save to,” and “New apps will save to,” use the dropdown menus to select your HDD (e.g., D:).
- Click “Apply.”
Step-by-Step (Windows 10):
- Open Settings: Click Start > Settings > System > Storage.
- Change Where New Content is Saved: Under “More storage settings,” click “Change where new content is saved.”
- Select HDD for Each Category:
- For “New apps will save to,” “New documents will save to,” “New music will save to,” “New photos and videos will save to,” and “New films and TV shows will save to,” use the dropdown menus to select your HDD.
- Click “Apply.”
Method 3: Moving User Profile Folders (Documents, Pictures, Videos, etc.)
Windows allows you to permanently redirect your personal user folders from the SSD to the HDD. This is great for keeping your C: drive clean.
Step-by-Step:
- Open File Explorer: Navigate to C:\Users\YourName (replace YourName with your actual user profile name).
- Right-Click Folder: Right-click on the folder you want to move (e.g., “Documents,” “Pictures,” “Videos,” “Downloads,” “Music”).
- Select “Properties”: Choose “Properties” from the context menu.
- Go to the “Location” Tab: In the properties window, click on the “Location” tab.
- Move Folder:
- Click the “Move…” button.
- Navigate to your HDD (e.g., D:).
- Select or create a new folder on your HDD where you want this user folder to reside (e.g., D:\Users\YourName\Documents).
- Click “Select Folder.”
- Confirm Move: Click “OK.” Windows will then ask, “Do you want to move all of the files from the old location to the new location?” Click “Yes.”
- Wait for Transfer: Windows will move all existing files from that user folder to the new location on your HDD. This might take some time depending on the size of the folder.
- Repeat: Repeat these steps for other user folders you wish to move.
Important: Do NOT move the “Users” folder itself. Only move the subfolders like Documents, Pictures, etc.
Method 4: Moving Installed Applications and Games
Moving installed programs, especially large games, from an SSD to an HDD can free up significant space.
Option A: Using Windows Settings (Windows 11/10)
This method works for apps downloaded from the Microsoft Store or some traditional desktop applications.
Step-by-Step:
- Open Apps & Features:
- Windows 11: Go to Settings > Apps > Installed apps.
- Windows 10: Go to Settings > Apps > Apps & features.
- Select and Move App:
- Find the app you want to move in the list.
- Click on the app (Windows 11) or click it once (Windows 10).
- If the app is movable, the “Move” button will be active. Click it.
- Select your HDD from the dropdown menu.
- Click “Move” again to confirm.
- Limitations: Not all applications can be moved this way. If the “Move” button is greyed out, you cannot use this method for that particular app.
Option B: Reinstalling Applications/Games
For applications that cannot be moved via Windows Settings, the most reliable approach is to uninstall and then reinstall them directly to your HDD.
Step-by-Step:
- Uninstall the Application/Game:
- Go to Settings > Apps > Installed apps (Windows 11) or Apps & features (Windows 10).
- Find the application/game and click “Uninstall.”
- Follow the uninstallation prompts.
- Reinstall to HDD:
- Run the installer for the application/game.
- During the installation process, when prompted for the installation location, ensure you select a folder on your HDD (e.g., D:\Program Files or D:\Games).
- For Game Launchers (Steam, Epic Games, etc.):
- These launchers often allow you to create multiple game libraries on different drives.
- Steam Example: In Steam, go to Settings > Downloads > Steam Library Folders. Click “+” to add a new library folder on your HDD. You can then move installed games between these libraries by right-clicking a game in your library, going to Properties > Installed Files > Move Install Folder.
Method 5: Symbolic Links (Advanced)
A symbolic link (symlink) is an advanced method that creates a shortcut that Windows treats as if it were the original file or folder. You can move the actual data to the HDD but maintain a symlink on the SSD, so applications still “see” it on the SSD. This is complex and best suited for specific scenarios and advanced users.
What You’ll Need:
- Basic understanding of Command Prompt.
- Elevated Command Prompt (Run as Administrator).
Step-by-Step (Example for a specific folder):
- Move the Original Folder: Manually move the folder you want to relocate (e.g., a specific game save folder or a large application component) from your SSD to your HDD (e.g., C:\OldGameSaves to D:\NewGameSaves).
- Open Command Prompt as Administrator: Search for cmd, right-click, and select “Run as administrator.”
- Create the Symbolic Link: Use the mklink command.
DOS
mklink /D “C:\OldGameSaves” “D:\NewGameSaves”
- /D: Specifies a directory symbolic link (for folders).
- “C:\OldGameSaves”: This is the path on your SSD where the folder used to be (the old location that applications expect).
- “D:\NewGameSaves”: This is the actual new path on your HDD where the folder now resides.
- Verify: After running the command, you will see a shortcut-like icon at the old location on your SSD, but Windows will treat it as the actual folder.
Caution: Incorrectly using symbolic links can lead to broken paths or system instability. Use this method only if you understand its implications.
Final Thoughts
Effectively managing your storage by knowing how to move files from SSD to HDD in Windows is a crucial aspect of maintaining a fast and efficient computer. By strategically placing your operating system and frequently used programs on the SSD, and relegating large, less accessed files to the HDD, you can enjoy the benefits of both storage technologies. Regularly review your storage usage and apply these methods to keep your system optimized.