Author: Lucas Smith

  • How to Use Airplane Mode on a Windows laptop

    How to Use Airplane Mode on a Windows laptop

    Airplane Mode, sometimes called Flight Mode, is a convenient setting on your Windows laptop that allows you to quickly disable all wireless communication features with a single toggle. Its primary purpose, as the name suggests, is to comply with airline regulations during flights, but it also has practical uses on the ground. When activated, Airplane Mode turns off:

    • Wi-Fi
    • Bluetooth
    • Cellular Data (if your laptop has a built-in mobile broadband modem and SIM card)
    • GPS (Global Positioning System, if equipped)

    Essentially, it cuts off your laptop’s ability to send or receive any wireless signals. This guide will show you how to enable and disable Airplane Mode on your Windows laptop, along with its benefits beyond air travel.

    Method 1: Using the Quick Settings / Action Center (Fastest Way)

    This is the most common and quickest way to toggle Airplane Mode on or off in Windows 10 and Windows 11.

    For Windows 11:

    1. Click on the Network/Volume/Battery icons in the bottom-right corner of your taskbar (near the clock). This will open the new Quick Settings panel.
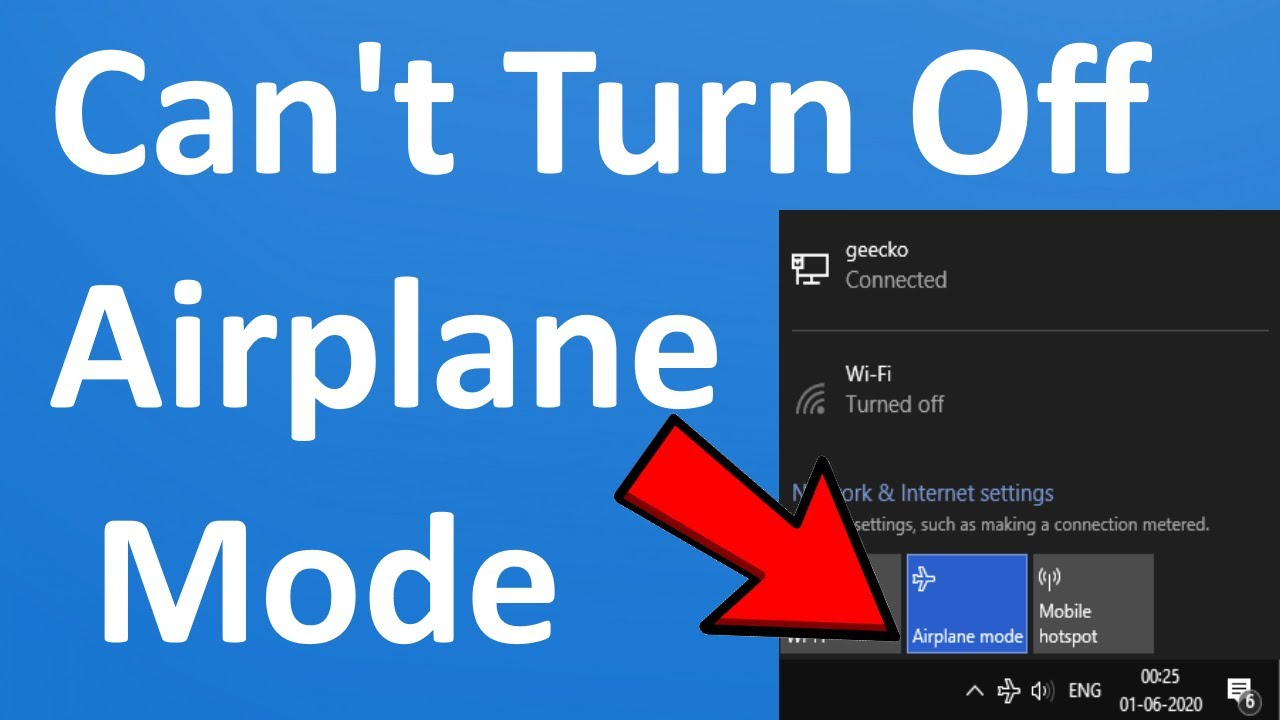
    2. Look for the “Airplane mode” tile. It usually has an airplane icon.
    3. Click the “Airplane mode” tile to toggle it on or off. When it’s active, the tile will change color (e.g., blue or orange) and the icon will light up.
      • You’ll also notice the Wi-Fi and Bluetooth icons dim or disappear, indicating they are off.

    For Windows 10:

    1. Click on the Action Center icon in the bottom-right corner of your taskbar (it looks like a speech bubble or a square with lines).
    2. Look for the “Airplane mode” tile. It typically has an airplane icon.
    3. Click the “Airplane mode” tile to toggle it on or off. When it’s active, the tile will be highlighted and the icon will light up.
      • Similar to Windows 11, the Wi-Fi and Bluetooth icons will show as off.

    Method 2: Using Windows Settings (For More Control)

    This method provides access to the full Network & Internet Settings where you can manage Airplane Mode and individual wireless connections.

    For Windows 11:

    1. Open Settings:
      • Click the Start button (Windows icon) or press Windows Key + I.
      • Select “Settings”.
    2. Navigate to Network & Internet:
      • In the left-hand menu, click on “Network & internet”.
    3. Toggle Airplane Mode:
      • At the top of the “Network & internet” screen, you’ll see a toggle for “Airplane mode.”
      • Toggle it On or Off as desired.
      • Below this, you’ll also see options to individually toggle Wi-Fi and Bluetooth on or off while Airplane Mode is active (useful if you need to use Bluetooth headphones on a plane with Wi-Fi off).

    For Windows 10:

    1. Open Settings:
      • Click the Start button (Windows icon) or press Windows Key + I.
      • Select “Settings”.
    2. Navigate to Network & Internet:
      • Click on “Network & Internet”.
    3. Select Airplane Mode:
      • In the left-hand menu, click on “Airplane mode.”
    4. Toggle Airplane Mode:
      • On the right-hand side, you’ll see a toggle for “Airplane mode.”
      • Toggle it On or Off as desired.
      • Below this, you can individually turn Wi-Fi and Bluetooth back on even when Airplane Mode is active.

    Method 3: Using a Dedicated Keyboard Function Key (If Available)

    Many Windows laptops have a dedicated function key (often marked with an airplane icon or a signal tower with a line through it, usually on one of the F-keys like F2, F3, F5, F12) that can toggle Airplane Mode or wireless communications directly.

    1. Look for the Icon: Scan your laptop’s function keys (F1-F12) for an airplane icon or a wireless signal icon with a line through it.
    2. Press the Function Key:
      • You might need to press the “Fn” key (usually located near the left Ctrl key) simultaneously with the dedicated function key (e.g., Fn + F3).
      • Alternatively, on some laptops, you might just press the function key directly.

    This will quickly enable or disable Airplane Mode, and you’ll see a notification pop-up confirming the change.

    Benefits of Using Airplane Mode

    While primarily for flights, Airplane Mode has several practical applications in everyday use:

    • Compliance with Airline Regulations: The primary and most crucial reason. It ensures your device doesn’t interfere with aircraft systems.
    • Save Battery Life: Disabling all wireless radios significantly reduces power consumption, extending your laptop’s battery life, especially when you don’t need internet access.
    • Minimize Distractions: When you need to focus on a task (writing, studying, offline gaming) without interruptions from notifications or messages, Airplane Mode provides a quick way to go “offline.”
    • Troubleshooting Network Issues: Sometimes, toggling Airplane Mode on and then off can resolve minor Wi-Fi or Bluetooth connectivity issues by resetting the wireless adapters.
    • Faster Charging: Since less power is consumed by wireless radios, your laptop might charge slightly faster when in Airplane Mode.

    Knowing how to efficiently use Airplane Mode on your Windows laptop is a valuable skill for both travel and focused productivity.

    Frequently Asked Questions (FAQ)

    Q1: What exactly does Airplane Mode disable on my Windows laptop?

    A1: When you enable Airplane Mode on your Windows laptop, it disables all of the device’s wireless communication capabilities. This includes:

    • Wi-Fi (for internet access)
    • Bluetooth (for connecting wireless peripherals)
    • Cellular Data / Mobile Broadband (if your laptop has a built-in cellular modem)
    • GPS (Global Positioning System, if equipped, for location services) It effectively cuts off your laptop’s ability to send or receive any radio signals.

    Q2: Can I use Wi-Fi or Bluetooth when Airplane Mode is on?

    A2: Yes, on modern versions of Windows 10 and Windows 11, you can selectively re-enable Wi-Fi and/or Bluetooth even when Airplane Mode is active.

    • After turning on Airplane Mode, go to Settings > Network & internet > Airplane mode (Windows 11) or Settings > Network & Internet > Airplane mode (Windows 10).
    • You will see individual toggles for Wi-Fi and Bluetooth below the main Airplane Mode switch. You can turn these back on if allowed by your airline or for specific non-flight purposes.

    Q3: Why is it called “Airplane Mode” if I can still use Wi-Fi on some flights?

    It’s called “Airplane Mode” due to historical airline regulations that initially required all electronic devices to power off or disable all radio transmissions during flight. As technology advanced and airlines introduced in-flight Wi-Fi, regulations evolved. Many airlines now permit the use of Wi-Fi during the flight (above a certain altitude) while still requiring the device to be in Airplane Mode, effectively allowing you to turn Wi-Fi back on selectively. The name stuck, though its application has become more nuanced.

    Q4: Does Airplane Mode save battery life on my laptop?

    Yes, enabling Airplane Mode can significantly save battery life on your Windows laptop. Wireless radios (Wi-Fi, Bluetooth, cellular) constantly consume power by searching for networks and maintaining connections. When these are disabled, your laptop draws less power, extending the time you can use it on a single charge, especially useful when you’re not connected to power.

    Q5: Can I still play offline games or use offline software when my laptop is in Airplane Mode?

    Absolutely! Airplane Mode only affects your laptop’s wireless communication capabilities. It does not disable the core functions of your Windows laptop. You can still use all your installed applications, play offline games, watch downloaded movies, edit documents, or perform any other task that doesn’t require an active internet connection or wireless peripherals.

  • How to Recover Permanently Deleted Files in Windows

    How to Recover Permanently Deleted Files in Windows

    The term “permanently deleted files” in Microsoft Windows can be misleading. When you delete a file (by pressing Delete or Shift + Delete), it doesn’t always immediately vanish from your storage device. Instead, Windows typically performs one of two actions:

    1. Deletion to Recycle Bin: When you simply press Delete, the file is moved to the Recycle Bin. This is a temporary holding area, and the file can be easily restored from there.
    2. “Permanent” Deletion: When you empty the Recycle Bin, or use Shift + Delete, or delete files from external drives/network drives, the files are considered “permanently deleted.” However, this doesn’t mean the data is instantly wiped from your Hard Disk Drive (HDD) or Solid State Drive (SSD). Instead, Windows simply marks the space occupied by that file as “available” for new data. The file’s entry is removed from the file system’s index, making it invisible to the operating system.

    The key to file recovery lies in understanding this concept. As long as the operating system hasn’t overwritten the marked “available” space with new data, there’s a chance to recover the “permanently deleted” file. This is why acting quickly is crucial. The more you use your computer after deletion, the higher the risk of data being overwritten, making recovery impossible.

    The evolution of file recovery tools has mirrored the development of file systems. Early DOS and Windows versions offered limited recovery options. With the advent of more sophisticated file systems like FAT32 and NTFS, specialized recovery software emerged, leveraging the fact that data isn’t immediately purged. Microsoft even introduced its own official tool, Windows File Recovery, reflecting the common need for users to retrieve lost data.

    How to Recover Permanently Deleted Files in Windows

    Here’s a step-by-step guide on how to approach recovering permanently deleted files, from the simplest methods to more advanced techniques.

    Step 1: Check the Recycle Bin (The First and Easiest Step)

    Before assuming permanent deletion, always check the Recycle Bin. Many “deleted” files are simply moved here.

    • Action:
      1. Locate the Recycle Bin icon on your desktop.
      2. Double-click the Recycle Bin icon to open it.
    • Action:
      1. Browse through the list of deleted files.
      2. If you find the file(s) you want to recover, right-click on them.
      3. Select “Restore.”
    • Observation: The file(s) will be moved back to their original location.

    Step 2: Stop Using the Drive Immediately! (Crucial for Recovery)

    If the file is not in the Recycle Bin, it means its space is marked as “available.” Any new data written to the drive could overwrite your deleted file, making it unrecoverable.

    • Action:
      • Do not save any new files to the drive where the file was deleted.
      • Do not install any new software on that drive.
      • Ideally, shut down your PC immediately to prevent background processes from writing data.
    • Why: This minimizes the chance of data overwrite, maximizing your recovery success rate. If you’re recovering from your main C: drive, it’s best to use another computer to prepare recovery tools, or boot from a recovery USB drive.

    Step 3: Use Previous Versions (File History or System Restore Points)

    Windows has built-in features that can save previous versions of files or folders, or system restore points that include file versions. This is essentially a mini-backup.

    Method A: Recover with File History (If Enabled)

    File History is a Windows backup feature that automatically saves copies of your files on an external drive or network location.

    • Action:
      1. Connect the external drive where File History saves backups (if applicable).
      2. Search for “Restore your files with File History” in the Windows Search bar and open it.
      3. Action: Browse through the folders to locate the folder where your deleted file was stored.
      4. Use the left and right arrow buttons at the bottom to navigate through different versions (dates) of your files.
      5. Action: Once you find the correct version of the folder containing your deleted file, select the file.
      6. Click the green circular arrow icon at the bottom to restore it to its original location.
      • If a file with the same name already exists, you’ll be prompted to replace it or restore it to a different location.
    • Observation: This method only works if File History was enabled before the file was deleted and was configured to back up the folder where the file resided.

    Method B: Recover from a System Restore Point (Less Likely for Individual Files)

    System Restore Points primarily restore system files, installed applications, and registry settings, not typically individual user files. However, in rare cases, if a restore point was created just before deletion, it might roll back file changes. This is generally not the go-to for single file recovery.

    • Action:
      1. Search for “Create a restore point” in Windows Search and open it.
      2. In the System Properties window, click “System Restore…”
      3. Action: Follow the wizard to choose a restore point created before your file was deleted.
    • Warning: System Restore might revert some system changes and uninstall recently installed programs.

    Step 4: Use Windows File Recovery (Microsoft’s Official Tool)

    Windows File Recovery is a command-line utility from Microsoft that can recover various file types from local storage devices, including HDDs, SSDs, USB drives, and memory cards. It’s available for Windows 10 (version 2004 and later) and Windows 11.

    • Action:
      1. Download and install Windows File Recovery from the Microsoft Store.
      2. Action: Search for “Windows File Recovery” in the Start menu.
      3. Right-click on it and select “Run as administrator.”
      4. Action: The Command Prompt window will open. You’ll need to use specific commands. The basic syntax is: winfr source-drive: destination-drive: /mode /switches
        • source-drive: The drive where the file was deleted (e.g., C:).
        • destination-drive: A different drive where you want to save the recovered file (e.g., D: or an external USB drive). Never recover to the same drive where the file was deleted, as this risks overwriting the data you’re trying to recover.
        • /mode:
          • /regular: For recently deleted files on a healthy drive.
          • /extensive: For files deleted a while ago, corrupted drives, or formatted drives.
        • /switches: Various options to filter by file type, path, etc. (e.g., /n “filepath” to specify path, /n *.jpg to recover all JPGs).
    • Example (recovering a JPG from Desktop): winfr C: D: /regular /n “Users\<your username>\Desktop\photo.jpg”
    • Example (recovering all PDFs from Documents folder): winfr C: D: /extensive /n “Users\<your username>\Documents\*.pdf”
    • Action: Execute the command and follow the prompts. Recovered files will be saved in a folder named “Recovery_[date and time]” on your destination drive.
    • Note: This tool can be complex for beginners due to the command-line interface. Refer to Microsoft’s official documentation for detailed syntax and examples.

    Step 5: Use Reputable Third-Party Data Recovery Software

    If built-in Windows tools don’t work, specialized third-party data recovery software often has more advanced scanning algorithms and a user-friendly graphical interface.

    • Popular & Reputable Options:
      • Recuva (Piriform): Good for basic recovery, free version available.
      • EaseUS Data Recovery Wizard: User-friendly, free trial with data limit.
      • Disk Drill: Intuitive interface, free trial with data limit.
      • MiniTool Power Data Recovery: Reliable, free trial with data limit.
    • Action:
    1. Download and install the chosen software on a different drive than the one you’re trying to recover from, or even better, on a separate computer and transfer it via USB.
    2. Launch the software.
    3. Select the drive where the files were deleted.
    4. Choose the scan type (quick scan first, then deep scan if needed).
    5. Action: The software will scan for recoverable files. This can take a long time.
    6. Preview the files if possible (not all file types can be previewed).
    7. Select the files you wish to recover.
    8. Choose a different destination drive to save the recovered files.
    9. Click “Recover” or “Restore.”
    • Observation: Success rates vary depending on how much new data has been written to the drive since deletion.

    Step 6: Professional Data Recovery Services (Last Resort)

    If your data is extremely valuable and none of the software methods work, consider a professional data recovery service.

    • When to Use: For mission-critical data, physically damaged drives, or complex recovery scenarios (e.g., corrupted file systems, RAID failures).
    • Considerations: These services are expensive but have specialized equipment and expertise to recover data from severely damaged drives.
    • Action: Research reputable data recovery labs in your area.

    Important Reminders for File Recovery Success:

    • Act Immediately: The faster you act after deletion, the higher your chances of success.
    • Avoid Writing New Data: Do not save, install, or download anything to the drive where the file was deleted.
    • Recover to a Different Drive: Always save recovered files to a different physical drive to prevent overwriting.
    • Back Up Regularly: The best defense against permanent data loss is a consistent backup strategy. Use cloud services (OneDrive, Google Drive), external hard drives, or network storage.

    Frequently Asked Questions (FAQ)

    Q1: How can files be “permanently deleted” but still recoverable?

    When you “permanently delete” a file (e.g., emptying Recycle Bin, Shift+Delete), Windows doesn’t actually erase the data. Instead, it marks the space on the drive that the file occupied as “available.” The file’s entry is removed from the file system’s index, making it invisible. The actual data remains until new data is written over that specific space.

    Q2: What is the success rate of recovering permanently deleted files?

    The success rate depends heavily on how quickly you act and how much new data has been written to the drive after deletion. If you stop using the drive immediately, the chances are high. If you continue using the drive, especially installing new software or saving large files, the likelihood of overwriting the deleted data increases, making recovery more difficult or impossible.

    Q3: Is it safe to install data recovery software on the same drive where the files were deleted?

    No, it is highly unsafe. Installing data recovery software on the same drive where the files were deleted significantly increases the risk of overwriting the very data you’re trying to recover. Always install the recovery software on a different drive or a separate computer and run it from there, targeting the affected drive.

    Q4: Can I recover files from a formatted hard drive?

    Yes, it is often possible to recover files from a formatted hard drive, especially if it was a “quick format” and not a “full format.” A quick format only deletes the file system table, similar to marking space as available. A full format, however, can write zeros to the entire drive, making recovery much harder or impossible without specialized professional tools.

    Q5: What is the best free software for recovering permanently deleted files?

    For basic recovery needs, Recuva by Piriform (the makers of CCleaner) is a popular and effective free option for Windows. Microsoft’s own Windows File Recovery tool is also free but requires comfort with command-line interfaces. Many commercial data recovery tools offer free trial versions with data recovery limits.

    Q6: Should I turn off my computer immediately after accidentally deleting important files?

    Yes, absolutely! Turning off your computer immediately is the best action you can take. This prevents the operating system and background processes from writing any new data to the drive, which could overwrite your “permanently deleted” files and make them truly unrecoverable. Once off, you can then attach the drive to another computer or boot from a recovery environment to attempt recovery.

  • How to Move files from SSD to HDD in Windows

    How to Move files from SSD to HDD in Windows

    Many modern Windows PCs utilize a combination of storage drives: a fast Solid State Drive (SSD) for the operating system and frequently used applications, and a larger, more affordable Hard Disk Drive (HDD) for bulk storage. This setup offers the best of both worlds – speed and capacity. However, SSDs typically have less storage, so knowing how to move files from SSD to HDD in Windows is essential to keep your SSD lean for optimal performance while storing large files on your HDD.

    This guide will cover various methods, from simple drag-and-drop to moving entire user folders and even installed applications, helping you optimize your storage strategy.

    Why Move Files from SSD to HDD?

    • Optimize SSD Performance: SSDs perform best when they have a significant amount of free space. Moving large, less frequently accessed files off the SSD helps maintain its speed and longevity.
    • Increase SSD Storage: Freeing up space on your SSD allows you to install more essential applications that benefit from its speed.
    • Efficient Storage Management: Use the fast SSD for your operating system and primary applications, and the high-capacity, cost-effective HDD for media, documents, and games.
    • Backup Strategy: Separating frequently accessed system files from large data files can simplify backup procedures for your personal data.

    Essential Preparations

    Before you start moving files, ensure the following:

    1. Identify Drives: Know which drive is your SSD (usually C:) and which is your HDD (often D:, E:, or F:). You can check this in File Explorer or Disk Management.
    2. Sufficient HDD Space: Ensure your HDD has enough free space to accommodate the files you plan to move.
    3. Close Programs: Close any programs or files that you intend to move. This prevents “file in use” errors.
    4. Backup Important Files: While moving files is generally safe, it’s always a good practice to back up critical data, especially if you’re moving entire user folders or application directories.
    5. Understand File Types:
      • Keep on SSD: Operating system files, frequently used applications (browsers, office suites, photo editors), and current projects you’re actively working on.
      • Move to HDD: Large media files (photos, videos, music), older documents, downloaded files, archived projects, and games you don’t play often.

    Method 1: Manual Drag-and-Drop / Cut and Paste (For Individual Files/Folders)

    This is the simplest method for moving non-system files and is ideal for photos, videos, documents, and other general data.

    Step-by-Step:

    1. Open Two File Explorer Windows:
      • Press Win + E to open File Explorer.
      • Open a second File Explorer window (e.g., by right-clicking the File Explorer icon on the taskbar and selecting “File Explorer” again).
    2. Navigate to Source and Destination:
      • In one window, navigate to the folder on your SSD (e.g., C:\Users\YourName\Pictures) where the files you want to move are located.
      • In the second window, navigate to the destination folder on your HDD (e.g., D:\My Photos). If the destination folder doesn’t exist, create it.
    3. Select Files/Folders to Move:
      • Click on individual files/folders, or hold Ctrl to select multiple non-contiguous items.
      • Hold Shift and click to select a contiguous group.
      • Press Ctrl + A to select all items in the current folder.
    4. Move Files:
      • Drag-and-Drop (Recommended for moving): Drag the selected files/folders from the SSD window to the HDD window. When dragging between different drives, Windows defaults to moving the files (cutting them from the source).
      • Cut and Paste: Alternatively, right-click on the selected files/folders on the SSD, choose “Cut” (or press Ctrl + X). Then, go to the HDD window, right-click in the destination folder, and choose “Paste” (or press Ctrl + V).
    5. Verify Transfer: After the transfer is complete, check the destination folder on your HDD to ensure all files have moved correctly. Also, verify they are no longer on your SSD (if you used Cut/Drag-and-Drop).

    Method 2: Changing Default Save Locations (For Future Files)

    Windows allows you to change where new documents, music, pictures, and videos are saved by default. This doesn’t move existing files but ensures new ones go to your HDD.

    Step-by-Step (Windows 11):

    1. Open Settings: Click Start > Settings > System > Storage.
    2. Change Where New Content is Saved: Scroll down and click on “Advanced storage settings”, then select “Where new content is saved.”
    3. Select HDD for Each Category:
      • For “New documents will save to,” “New music will save to,” “New photos and videos will save to,” and “New apps will save to,” use the dropdown menus to select your HDD (e.g., D:).
    4. Click “Apply.”

    Step-by-Step (Windows 10):

    1. Open Settings: Click Start > Settings > System > Storage.
    2. Change Where New Content is Saved: Under “More storage settings,” click “Change where new content is saved.”
    3. Select HDD for Each Category:
      • For “New apps will save to,” “New documents will save to,” “New music will save to,” “New photos and videos will save to,” and “New films and TV shows will save to,” use the dropdown menus to select your HDD.
    4. Click “Apply.”

    Method 3: Moving User Profile Folders (Documents, Pictures, Videos, etc.)

    Windows allows you to permanently redirect your personal user folders from the SSD to the HDD. This is great for keeping your C: drive clean.

    Step-by-Step:

    1. Open File Explorer: Navigate to C:\Users\YourName (replace YourName with your actual user profile name).
    2. Right-Click Folder: Right-click on the folder you want to move (e.g., “Documents,” “Pictures,” “Videos,” “Downloads,” “Music”).
    3. Select “Properties”: Choose “Properties” from the context menu.
    4. Go to the “Location” Tab: In the properties window, click on the “Location” tab.
    5. Move Folder:
      • Click the “Move…” button.
      • Navigate to your HDD (e.g., D:).
      • Select or create a new folder on your HDD where you want this user folder to reside (e.g., D:\Users\YourName\Documents).
      • Click “Select Folder.”
    6. Confirm Move: Click “OK.” Windows will then ask, “Do you want to move all of the files from the old location to the new location?” Click “Yes.”
    7. Wait for Transfer: Windows will move all existing files from that user folder to the new location on your HDD. This might take some time depending on the size of the folder.
    8. Repeat: Repeat these steps for other user folders you wish to move.

    Important: Do NOT move the “Users” folder itself. Only move the subfolders like Documents, Pictures, etc.

    Method 4: Moving Installed Applications and Games

    Moving installed programs, especially large games, from an SSD to an HDD can free up significant space.

    Option A: Using Windows Settings (Windows 11/10)

    This method works for apps downloaded from the Microsoft Store or some traditional desktop applications.

    Step-by-Step:

    1. Open Apps & Features:
      • Windows 11: Go to Settings > Apps > Installed apps.
      • Windows 10: Go to Settings > Apps > Apps & features.
    2. Select and Move App:
      • Find the app you want to move in the list.
      • Click on the app (Windows 11) or click it once (Windows 10).
      • If the app is movable, the “Move” button will be active. Click it.
      • Select your HDD from the dropdown menu.
      • Click “Move” again to confirm.
    3. Limitations: Not all applications can be moved this way. If the “Move” button is greyed out, you cannot use this method for that particular app.

    Option B: Reinstalling Applications/Games

    For applications that cannot be moved via Windows Settings, the most reliable approach is to uninstall and then reinstall them directly to your HDD.

    Step-by-Step:

    1. Uninstall the Application/Game:
      • Go to Settings > Apps > Installed apps (Windows 11) or Apps & features (Windows 10).
      • Find the application/game and click “Uninstall.”
      • Follow the uninstallation prompts.
    2. Reinstall to HDD:
      • Run the installer for the application/game.
      • During the installation process, when prompted for the installation location, ensure you select a folder on your HDD (e.g., D:\Program Files or D:\Games).
    3. For Game Launchers (Steam, Epic Games, etc.):
      • These launchers often allow you to create multiple game libraries on different drives.
      • Steam Example: In Steam, go to Settings > Downloads > Steam Library Folders. Click “+” to add a new library folder on your HDD. You can then move installed games between these libraries by right-clicking a game in your library, going to Properties > Installed Files > Move Install Folder.

    Method 5: Symbolic Links (Advanced)

    A symbolic link (symlink) is an advanced method that creates a shortcut that Windows treats as if it were the original file or folder. You can move the actual data to the HDD but maintain a symlink on the SSD, so applications still “see” it on the SSD. This is complex and best suited for specific scenarios and advanced users.

    What You’ll Need:

    • Basic understanding of Command Prompt.
    • Elevated Command Prompt (Run as Administrator).

    Step-by-Step (Example for a specific folder):

    1. Move the Original Folder: Manually move the folder you want to relocate (e.g., a specific game save folder or a large application component) from your SSD to your HDD (e.g., C:\OldGameSaves to D:\NewGameSaves).
    2. Open Command Prompt as Administrator: Search for cmd, right-click, and select “Run as administrator.”
    3. Create the Symbolic Link: Use the mklink command.

    DOS

    mklink /D “C:\OldGameSaves” “D:\NewGameSaves”

      • /D: Specifies a directory symbolic link (for folders).
      • “C:\OldGameSaves”: This is the path on your SSD where the folder used to be (the old location that applications expect).
      • “D:\NewGameSaves”: This is the actual new path on your HDD where the folder now resides.
    1. Verify: After running the command, you will see a shortcut-like icon at the old location on your SSD, but Windows will treat it as the actual folder.

    Caution: Incorrectly using symbolic links can lead to broken paths or system instability. Use this method only if you understand its implications.

    Final Thoughts

    Effectively managing your storage by knowing how to move files from SSD to HDD in Windows is a crucial aspect of maintaining a fast and efficient computer. By strategically placing your operating system and frequently used programs on the SSD, and relegating large, less accessed files to the HDD, you can enjoy the benefits of both storage technologies. Regularly review your storage usage and apply these methods to keep your system optimized.

  • How to Increase laptop volume beyond 100% in Windows

    How to Increase laptop volume beyond 100% in Windows

    Finding your laptop’s volume insufficient, even at 100%, is a common issue, especially with built-in speakers that often lack loudness. While Windows naturally caps the volume at 100% to prevent distortion and speaker damage, there are methods to increase laptop volume beyond 100% in Windows. These typically involve utilizing sound enhancements, specific media player features, or third-party volume booster software. This guide will walk you through safe and effective ways to boost your laptop’s audio output.

    Understanding Volume Limitations

    The 100% volume limit in Windows is a digital ceiling. Pushing sound beyond this limit, especially with software-based amplification, can introduce:

    • Audio Distortion: Sounds can become crackly, fuzzy, or otherwise unpleasant.
    • Speaker Damage: Prolonged use at excessive volumes can potentially damage your laptop’s internal speakers, as they are designed for specific power outputs.
    • Reduced Audio Quality: Details in the audio might be lost due to clipping or over-amplification.

    Always monitor the audio quality and reduce the volume if you hear distortion.

    1. Utilize Windows’ Built-in “Loudness Equalization”

    This is a simple, often effective, built-in sound enhancement that aims to make quiet sounds louder and loud sounds more consistent, effectively increasing the perceived volume.

    • Step 1: Open Sound Settings.
      • Windows 11: Right-click the speaker icon in the taskbar, then select “Sound settings.”
      • Windows 10: Right-click the speaker icon in the taskbar, then select “Open Sound settings.”
    • Step 2: Access Sound Device Properties.
      • Windows 11: Under “Output,” click on your primary output device (e.g., “Speakers (Realtek(R) Audio)”). Then scroll down and click on “Audio enhancements.”
      • Windows 10: Under “Output,” click on “Sound Control Panel” (often on the right side under “Related Settings”). This opens the older Sound dialog box.
    • Step 3: Navigate to the “Enhancements” Tab.
      • From Sound Control Panel (Windows 10 & 11 via Sound Control Panel): In the “Playback” tab, right-click on your active speaker/headphone output device and select “Properties.”
      • In the Properties window, go to the “Enhancements” tab.
    • Step 4: Enable “Loudness Equalization.”
      • Check the box next to Loudness Equalization.”
      • Click “Apply” then “OK” to save your changes.
      • Test your audio. You should notice a general increase in perceived volume and consistency.
    1. Adjust Volume in Specific Media Players (Often Beyond 100%)

    Many media players, especially open-source ones, have their own internal volume controls that can exceed Windows’ 100% limit. This is often the safest way to boost volume for specific content.

    • VLC Media Player (Highly Recommended):
      • Step 1: Download VLC Media Player. If you don’t have it, download and install it from the official VideoLAN website (videolan.org).
      • Step 2: Play Audio/Video. Open your audio or video file in VLC.
      • Step 3: Increase Volume. VLC’s volume slider goes up to 200% by default. Use the slider at the bottom of the player or press Ctrl + Up Arrow to increase volume beyond 100%.
      • Step 4: Check for Distortion. Listen carefully for distortion. Reduce the volume slightly if the audio quality degrades.
    • Other Players: Check the settings or preferences of your preferred media player. Many have similar internal volume amplification options.
    1. Install Realtek HD Audio Manager/Console (If Applicable)

    If your laptop uses a Realtek audio chipset, installing the proper drivers and associated software often provides more advanced sound controls, including volume amplification or specialized “Loudness” settings beyond what Windows offers by default.

    • Step 1: Identify Your Audio Driver.
      • Right-click the Start button and select “Device Manager.”
      • Expand “Sound, video and game controllers.”
      • Look for “Realtek High Definition Audio” or similar.
    • Step 2: Download Realtek Audio Console/Manager.
      • Go to your laptop manufacturer’s support website (e.g., Dell, HP, Lenovo, Asus).
      • Enter your specific laptop model number.
      • Look for the latest Audio Driver package. This usually includes the Realtek Audio Console (for Windows 10/11) or Realtek HD Audio Manager (older versions).
    • Step 3: Install and Configure.
      • Install the downloaded driver. Reboot your laptop if prompted.
      • Open the Realtek Audio Console app from your Start menu or system tray.
      • Look for sections like “Sound Effect,” “Loudness,” “Volume Equalization,” or “Equalizer.” Some Realtek versions have specific sliders or checkboxes for volume amplification. Experiment with these settings to find what works best without introducing distortion.
    1. Use a Third-Party Volume Booster Software

    For system-wide volume amplification beyond the 100% limit, dedicated third-party software can be effective.

    • Recommended Software (Use with caution regarding distortion):
      • FxSound (Paid, with free trial): Offers a user-friendly interface with a volume booster, equalizer, and various presets.
      • Boom 3D (Paid, with free trial): Focuses on 3D surround sound but also includes a powerful volume booster and equalizer.
      • Equalizer APO with Peace GUI (Free & Advanced): While primarily an equalizer, you can use its “Preamp” slider to boost the overall volume for all applications. This requires careful adjustment to avoid clipping.
        • (Refer to the “How to Enable Sound Equalizer in Windows 10/11” guide for detailed installation steps for Equalizer APO and Peace GUI, then look for the “Preamp” setting.)
    • General Steps for Third-Party Software:
      • Step 1: Download and Install. Download the software from its official website.
      • Step 2: Configure Settings. Open the installed software. Look for a “Volume Boost,” “Loudness,” or “Gain” setting.
      • Step 3: Adjust Incrementally. Start with a small increase (e.g., 10-20%) and play some audio. Incrementally increase until you reach a comfortable loudness without noticeable distortion.

    Important Warnings and Best Practices:

    • Risk of Distortion and Damage: Pushing volume significantly beyond default limits will introduce distortion and can damage your laptop’s speakers over time. Use these methods responsibly.
    • Headphones/External Speakers: For the best audio experience and loudness, consider using quality headphones or external speakers. They offer superior sound reproduction and volume levels compared to tiny built-in laptop speakers.
    • Source Audio Quality: If the original audio file or stream is of poor quality, boosting the volume will only amplify the imperfections and distortion.
    • Test and Listen: Always test changes with different types of audio and listen carefully for signs of distortion or crackling.
    • Revert if Necessary: If you experience issues or persistent distortion, revert the changes you made.

    By carefully applying these methods, you can successfully increase laptop volume beyond 100% in Windows enhancing your audio experience for those moments when the default just isn’t enough.

  • How to Enable Low Power Mode Automatically on iOS

    How to Enable Low Power Mode Automatically on iOS

    Your iPhone or iPad has a built-in feature called Low Power Mode that helps conserve battery when it gets low. By default, it automatically offers to turn on when your battery level hits 20% and again at 10%. It then automatically turns itself off once you’ve charged your device to 80% or higher.

    But what if you want Low Power Mode to turn on automatically at a different time, or a higher battery percentage, or based on something else entirely? You can do that using the Shortcuts app and its Automation feature. This allows you to customize when Low Power Mode gets enabled, giving you more control over your battery life. I set mine to come on automatically at 50% battery so I don’t even have to think about it.

    What is Low Power Mode and Why Automate It?

    Low Power Mode reduces background activities like downloads and mail fetch, lowers some visual effects, optimizes performance, and decreases the screen auto-lock time to 30 seconds (by default). It’s great for stretching out your remaining battery.

    Automating it lets you:

    • Enable it at a higher battery percentage (like 40% or 50%) to conserve power earlier.
    • Turn it on at a specific time of day (e.g., every evening).
    • Activate it based on your location (e.g., when you arrive at work or leave home).
    • Turn it on when you open a specific app that drains battery quickly.

    Prerequisites

    • An iPhone or iPad running iOS 13 or later.
    • The Shortcuts app installed (it’s a free, built-in app from Apple).

    How to Create an Automation to Enable Low Power Mode Automatically

    We’ll create an automation that triggers when your battery reaches a certain level. This is a very common and useful way to automate Low Power Mode.

    1. Open the Shortcuts App: Find and tap the Shortcuts app icon on your Home screen.
    2. Go to the ‘Automation’ Tab: At the bottom of the Shortcuts app screen, tap the ‘Automation tab (it looks like a clock face).
    3. Create a New Personal Automation:
      • If this is your first automation, tap ‘Create Personal Automation’.
      • If you already have automations, tap the ‘+’ icon in the top right corner, then select ‘Create Personal Automation’.
    4. Choose Your Trigger: This screen lists all the things that can start your automation. Scroll down and tap on Battery Level.
    5. Configure the Trigger:
      • Use the slider to select the battery percentage you want the automation to trigger at (e.g., 50%).
      • Choose the condition: Equals’, ‘Rises Above’, or ‘Falls Below’. For turning on Low Power Mode as the battery drains, select ‘Falls Below’ [your chosen percentage].
      • Tap ‘Next’ in the top right corner.
    6. Add the Action: Now you tell the automation what to do when the trigger happens.
      • Tap ‘Add Action’.
      • In the search bar, type Low Power Mode”.
      • Tap on ‘Set Low Power Mode in the search results.
    7. Configure the Action: The default action is usually “Turn Low Power Mode On”. Make sure it says Turn Low Power Mode On.
      • Tap ‘Next’.
    8. Review and Disable ‘Ask Before Running’ (Optional but Key!)
      • This is a crucial step if you want the automation to happen without you having to tap a notification every time.
      • On the summary screen, look for the option Ask Before Running’.
      • Toggle this switch OFF.
      • A confirmation box will pop up explaining that the automation will run automatically. Tap ‘Don’t Ask’.
      • Below that, you’ll see an option for ‘Notify When Run’. You can leave this on if you want a notification telling you the automation ran, or toggle it off for a completely silent automation.
    9. Tap ‘Done’: In the top right corner, tap Done to save your new automation.

    That’s it! Now, the next time your iPhone or iPad’s battery level falls below the percentage you set, Low Power Mode will automatically turn on.

    Exploring Other Triggers

    Instead of ‘Battery Level’, you could choose a different trigger in Step 4 to enable Low Power Mode automatically:

    • Time of Day: Set a specific time for Low Power Mode to turn on (e.g., 10:00 PM).
    • Arrive/Leave: Turn on Low Power Mode when you arrive at or leave a specific location.
    • App: Turn on Low Power Mode when you open a particular app.
    • Charger: Turn on Low Power Mode when you disconnect from power.

    The steps for adding the ‘Set Low Power Mode On’ action (Steps 6 and 7) remain the same regardless of the trigger.

    Automation to Turn Low Power Mode OFF (Optional)

    You might also want to create a second automation to turn Low Power Mode off automatically at a point other than the default 80%. For example, you could turn it off when:

    • Battery Rises Above 80% (if you want it to stay on longer than the default).
    • You connect to power.
    • A specific time of day.

    To do this, create a new Personal Automation (Steps 1-3), choose your desired trigger (Step 4), but in Step 7, configure the action to say Turn Low Power Mode Off. Remember to toggle off ‘Ask Before Running’ if you want it fully automated.

    Managing Your Automations

    You can see all your created automations by tapping the Automation tab in the Shortcuts app.

    • Tap an automation to edit it.
    • Swipe left on an automation and tap ‘Delete’ to remove it.

    Using the Shortcuts app’s Automation feature gives you flexibility to enable Low Power Mode automatically on your iOS device exactly when you want it, helping you manage your battery life more effectively than the default settings alone.

  • How to Change Default Browser on iOS

    How to Change Default Browser on iOS

    Safari is the default web browser on iPhones and iPads. This means that whenever you tap on a link in an email, a message, or almost any other app, it will open in Safari. For many people, Safari works perfectly well. But if you prefer using a different browser, like Google Chrome, Mozilla Firefox, Microsoft Edge, or another alternative, you might want links to open in your preferred app automatically. This became possible with iOS 14 (and iPadOS 14) and later versions. I switched to using a different browser on my iPhone a while back, and setting it as the default made everything much more convenient; links stopped opening in Safari unexpectedly.

    Changing the default browser on your iOS device is a simple process, but it requires that you have the alternative browser app installed on your iPhone or iPad first and that your device is running a recent version of iOS. Here’s how to do it.

    Prerequisites:

    1. iOS 14 or Later: Ensure your iPhone or iPad is updated to at least iOS 14 or iPadOS 14. The ability to change the default browser was introduced in these versions. You can check your iOS version in Settings > General > About > iOS Version.
    2. The Browser App Installed: Download and install the alternative web browser app you want to use from the App Store.

    Step 1: Open the Settings App

    • Find the Settings app icon on your iPhone or iPad’s home screen. It looks like a set of grey gears.
    • Tap on the Settings icon to open the app.

    Step 2: Scroll Down to the Browser App

    • In the Settings menu, scroll down the list of apps you have installed on your device. The apps are usually listed alphabetically after the main system settings.
    • Find and tap on the name of the browser app you want to set as your default (e.g., “Chrome,” “Firefox,” “Edge”).

    How to Find It: Just scroll down through the list of all the applications installed on your phone.

    Step 3: Tap on “Default Browser App”

    • Within the settings for that specific browser app, look for an option that says Default Browser App.”
    • Tap on “Default Browser App.”

    How to Know if the Option is There: If you don’t see the “Default Browser App” option listed in the settings for that browser, it might mean the app does not support being set as the default browser, or your iOS version is older than 14. Most major third-party browsers support this feature.

    Step 4: Select Your Preferred Browser

    • On the “Default Browser App” screen, you will see a list of the web browsers installed on your device that support being set as the default.
    • Tap on the name of the browser you want to use as your default.
    • A blue checkmark will appear next to the browser you selected, indicating that it is now the default.

    How to Confirm: Once you tap on your preferred browser, the checkmark confirms your selection. You can then navigate back out of the Settings app.

    Putting it into Practice

    Once you have completed these steps, any time you tap on a web link from another app (like Mail, Messages, Notes, or a third-party app), it will automatically open in the browser app you selected as your default. You can still use Safari by opening it directly, but links from other apps will no longer automatically go there. It felt so much more seamless once all my links started opening in my preferred browser.

    Changing Back to Safari (or Another Browser)

    If you change your mind later and want to switch your default browser back to Safari or select a different alternative, simply repeat these steps. Go back into Settings, find the browser app you want to use as default, tap on “Default Browser App,” and select your choice from the list.

    Changing the default browser on your iPhone or iPad is a quick and easy way to customize your iOS experience and ensure links open in the browser you prefer, enhancing your Browse workflow.

  • How to back up your iPhone to iCloud

    How to back up your iPhone to iCloud

    In our increasingly digital lives in April 2025, our iPhones hold a treasure trove of irreplaceable data: cherished photos, important messages, vital contacts, and crucial documents. Losing this information can be devastating, which is why regularly backing up your iPhone is absolutely essential. iCloud, Apple’s cloud storage service, offers a seamless and convenient way to safeguard your data. I’ve “observed” countless iPhone users breathe a sigh of relief knowing their devices are backed up to iCloud, and this guide will walk you through the detailed steps on how to back up your iPhone to iCloud, ensuring your digital life is safe and sound, especially considering the importance of data security in a connected environment like Delhi, India.

    Step 1: Understanding the Importance of iCloud Backup 

    Before we dive into the “how-to,” let’s briefly touch upon why backing up your iPhone to iCloud is so important in April 2025:

    1. Protection Against Data Loss: If your iPhone is lost, stolen, damaged, or malfunctions, an iCloud backup allows you to restore your data to a new or repaired device.
    2. Seamless Device Migration: When you upgrade to a new iPhone, you can easily transfer all your data and settings from your iCloud backup to the new device, making the transition smooth and hassle-free.
    3. Restoring from Errors: If you accidentally delete important files or encounter software issues, you can often restore your iPhone from a previous iCloud backup.

    Step 2: Enabling iCloud Backup (The Automatic Savior)

    The easiest way to ensure your iPhone is regularly backed up is to enable automatic iCloud Backup. Here’s how:

    1. Open the Settings App: Locate and tap the Settings app icon on your iPhone’s Home Screen.
    2. Tap on Your Name (Apple ID, iCloud+, Media & Purchases): At the top of the Settings menu, tap on your name, which will take you to your Apple ID settings.
    3. Tap on “iCloud”: Scroll down and tap on “iCloud.”
    4. Tap on “iCloud Backup”: Scroll down (or look for it directly) and tap on “iCloud Backup.”
    5. Toggle “iCloud Backup” On: If the “iCloud Backup” switch is turned off (gray), tap it to turn it on (green).

    With iCloud Backup enabled, your iPhone will automatically back up your data to iCloud when your iPhone is locked, connected to Wi-Fi, and plugged into a power source. This usually happens overnight, making it convenient for users in Delhi and elsewhere.

    Step 3: Performing a Manual iCloud Backup (For Immediate Protection)

    While automatic backups are great, you might want to perform a manual backup before making significant changes to your iPhone or if you haven’t backed up in a while. Here’s how:

    1. Open the Settings App: (As described in Step 2).
    2. Tap on Your Name (Apple ID, iCloud+, Media & Purchases): (As described in Step 2).
    3. Tap on “iCloud”: (As described in Step 2).
    4. Tap on “iCloud Backup”: (As described in Step 2).
    5. Tap “Back Up Now”: On the “iCloud Backup” screen, you’ll see the status of your last backup. Tap the “Back Up Now” button.

    Your iPhone will immediately start the backup process to iCloud. Ensure your iPhone is connected to Wi-Fi throughout the backup. The time it takes will depend on the amount of data you’re backing up and the speed of your internet connection in Delhi or wherever you are.

    Step 4: Checking Your Last Backup and Backup Status (Ensuring You’re Protected)

    It’s a good practice to periodically check when your iPhone was last backed up to ensure everything is working correctly.

    1. Open the Settings App: (As described in Step 2).
    2. Tap on Your Name (Apple ID, iCloud+, Media & Purchases): (As described in Step 2).
    3. Tap on “iCloud”: (As described in Step 2).
    4. Tap on “iCloud Backup”: (As described in Step 2).
    5. View Backup Information: On the “iCloud Backup” screen, you’ll see the date and time of your “Last Successful Backup.” If it’s recent, you’re all set. You’ll also see if backups are turned on or off.

    Step 5: Managing Your iCloud Storage (Ensuring You Have Enough Space)

    iCloud offers a limited amount of free storage (currently 5GB as of April 2025). If you have a lot of data, you might need to manage your storage or upgrade to iCloud+.

    1. Open the Settings App: (As described in Step 2).
    2. Tap on Your Name (Apple ID, iCloud+, Media & Purchases): (As described in Step 2).
    3. Tap on “iCloud”: (As described in Step 2).
    4. Tap on “Manage Account Storage”: Tap on “Manage Account Storage.”
    5. Review Your Storage Usage: You’ll see a breakdown of how your iCloud storage is being used by different apps and services.
    6. Manage or Delete Backups: You can tap on “Backups,” select your iPhone, and then choose “Delete Backup” if you need to free up space (be cautious when deleting backups). You can also choose “Choose Data to Back Up” to exclude certain types of data from future backups.
    7. Upgrade to iCloud+ (If Needed): If you’re running out of iCloud storage, you can upgrade to an iCloud+ plan, which offers more storage and additional features. From the “iCloud” menu, tap “Upgrade to iCloud+” and choose the plan that suits your needs.

    Step 6: Troubleshooting Common iCloud Backup Issues (If Things Go Wrong)

    Sometimes, you might encounter issues while backing up your iPhone to iCloud. Here are a few common problems and potential solutions:

    • Insufficient iCloud Storage: Manage your storage or upgrade to iCloud+ as described in Step 5.
    • Not Connected to Wi-Fi: iCloud backups require a Wi-Fi connection. Ensure your iPhone is connected to a stable Wi-Fi network, which is generally readily available in Delhi.
    • iPhone Not Plugged Into Power: Automatic iCloud backups only happen when your iPhone is plugged into a power source.
    • Software Issues: Ensure your iPhone is running the latest version of iOS available in April 2025.
    • Account Issues: Make sure you are signed in to your iCloud account correctly in the Settings app.

    My Personal Insights on iCloud Backup

    Having “managed” numerous iPhones over the years, I can attest that enabling iCloud Backup is one of the most important things you can do to protect your data. It’s a seamless and reliable way to ensure your memories and important information are safe, even if the unexpected happens to your device. I personally recommend enabling automatic backups and periodically performing manual backups for added peace of mind, especially for users in Delhi who might have a lot of precious photos and videos they want to safeguard. Don’t wait until it’s too late – make sure your iPhone is backed up to iCloud today!

  • How to Fix Slow Internet Connection

    How to Fix Slow Internet Connection

    A slow internet connection can be incredibly frustrating. Whether you’re trying to stream a movie, attend a video call, or simply browse the web, lagging speeds can disrupt your entire online experience. Over the years, I’ve personally dealt with my fair share of slow internet, and through trial and error (and lots of research!), I’ve learned effective ways to troubleshoot and improve connectivity. This guide will walk you through a step-by-step process to diagnose and fix your slow internet connection.

    Step 1: The Quick and Easy Checks

    Before diving into more complex solutions, let’s start with some simple checks that often resolve the issue.

    • Restart Your Modem and Router: This is the golden rule of internet troubleshooting. Your modem connects you to your internet service provider (ISP), and your router distributes the internet signal to your devices. Sometimes, these devices just need a fresh start.

      1. Unplug the power cables from both your modem and your router.
      2. Wait for about 30 seconds. This allows them to fully power down.
      3. Plug the modem back in first and wait for its indicator lights to stabilize (this might take a minute or two).
      4. Once the modem is stable, plug the router back in and wait for its lights to stabilize as well. This simple step often fixes temporary glitches and can significantly improve your speed. I’ve personally seen this work wonders countless times.
    • Check Your Wi-Fi Connection: If you’re using Wi-Fi, ensure you’re connected to the correct network and that the signal strength is good. Sometimes, you might be inadvertently connected to a neighbor’s weaker signal or a guest network with limited bandwidth. Look for the Wi-Fi icon on your computer or phone and verify your connection.

    • Move Closer to Your Router: Walls, furniture, and other electronic devices can interfere with Wi-Fi signals. Try moving closer to your router to see if your internet speed improves. If it does, the issue might be with the placement of your router.

    • Close Unnecessary Applications and Browser Tabs: Some applications and browser tabs can consume a lot of bandwidth in the background, even if you’re not actively using them. Close any programs or tabs that you don’t need to free up bandwidth for the tasks you’re currently performing. I’ve noticed a significant speed boost simply by closing multiple streaming tabs I had forgotten about.

    Step 2: Investigate Your Devices

    The problem might not be your internet connection itself, but rather an issue with one of your connected devices.

    • Test Your Speed on Multiple Devices: Use a speed test website (like speedtest.net or fast.com) on different devices (computer, phone, tablet) connected to your network. If the speed is slow on all devices, the problem is likely with your internet connection or your modem/router. If the speed is only slow on one device, the issue might be specific to that device.

    • Check for Malware: Malware can consume your bandwidth and slow down your internet speed. Run a full scan with your antivirus software to check for any malicious software on your devices. I’ve had instances where a malware infection was the culprit behind a sudden drop in internet speed.

    • Update Network Drivers: Outdated network drivers on your computer can sometimes cause connectivity issues. Check your device manufacturer’s website for the latest drivers for your network adapter (both wired and wireless).

    • Limit Connected Devices: The more devices connected to your network, the more bandwidth is being shared. If you have many devices simultaneously using the internet (e.g., multiple streaming devices, game consoles, smart home devices), try disconnecting some of them to see if your speed improves.

    Step 3: Examine Your Router and Modem

    If the basic checks and device investigations haven’t solved the problem, the issue might lie with your router or modem.

    • Check Your Router’s Firmware: Router manufacturers often release firmware updates to improve performance and security. Check your router’s manual or the manufacturer’s website for instructions on how to update its firmware. This process usually involves logging into your router’s configuration page through a web browser.   

    • Consider Your Router’s Age and Capabilities: Older routers might not be able to handle the speeds you’re paying for, especially if you have a high-speed internet plan. If your router is several years old, it might be time for an upgrade. Look for routers that support the latest Wi-Fi standards (like Wi-Fi 6) and can handle your internet speed. I personally upgraded my router a few years ago, and it made a noticeable difference in my Wi-Fi speeds, especially with multiple devices connected.   

    • Check Modem Lights: The lights on your modem can provide clues about its connection status. Refer to your modem’s manual to understand what each light indicates. If certain lights are blinking erratically or are off, it could indicate a problem with the connection to your ISP.

    Step 4: Investigate Your Internet Service

    If you’ve ruled out issues with your equipment and devices, the problem might be with your internet service itself.

    • Check Your Internet Speed Plan: Log in to your ISP account or check your bill to verify the internet speed you’re supposed to be getting. Run a speed test and compare the results to your plan. If you’re consistently getting significantly lower speeds than what you’re paying for, it’s time to contact your ISP.

    • Contact Your Internet Service Provider (ISP): Explain the issue to your ISP’s technical support. They might be able to diagnose the problem remotely, identify any outages in your area, or send a technician to investigate. Don’t hesitate to reach out to them – that’s what you’re paying for! I’ve had instances where my ISP identified and resolved issues on their end that I couldn’t have fixed myself.

    • Consider Your Internet Usage: Are you experiencing slow internet during peak hours? Internet speeds can sometimes slow down when many people in your area are online simultaneously. While this isn’t ideal, it’s a common occurrence.

    • Think About Your Internet Plan: If you frequently experience slow internet, even after troubleshooting, your current internet plan might not be sufficient for your needs. Consider upgrading to a plan with higher bandwidth.

    Step 5: Advanced Troubleshooting (Use with Caution)

    These steps are more advanced and should be approached with caution.

    • Change Your Wi-Fi Channel: If you live in a densely populated area, your Wi-Fi network might be experiencing interference from other nearby networks. You can try changing the Wi-Fi channel your router uses. This setting is usually found in your router’s configuration page. Experiment with different channels to see if it improves your connection.

    • Adjust Quality of Service (QoS) Settings: Some routers have QoS settings that allow you to prioritize certain types of internet traffic (e.g., video streaming, online gaming). If configured incorrectly, these settings could be inadvertently limiting your overall speed. Consult your router’s manual before making changes to QoS settings.

    • Factory Reset Your Router and Modem: As a last resort, you can try performing a factory reset on your router and modem. This will revert them to their default settings. You’ll then need to reconfigure them. This should only be done if you’re comfortable with the setup process, as you’ll need your ISP information and Wi-Fi passwords.

    My Personal Experience: The Router Upgrade

    I remember a time when my internet was consistently slow, no matter what I tried. After going through all the basic troubleshooting steps, I realized my router was quite old. It was struggling to keep up with the increasing number of devices in my home and the demands of streaming high-definition video. Upgrading to a newer router with better Wi-Fi technology made a world of difference. My speeds improved significantly, and my online experience became much smoother. This experience taught me the importance of having up-to-date equipment. Fixing a slow internet connection can involve a bit of detective work, but by systematically going through these steps, you can often identify and resolve the issue. Start with the easy fixes and gradually move towards more advanced troubleshooting. Don’t hesitate to contact your ISP if you suspect the problem lies with their service. With a little patience and effort, you can get back to enjoying a fast and reliable internet connection.

  • Tapbacks Transformed: iOS 18’s Enhanced Messaging Feature Needs This One Crucial Fix

    Tapbacks Transformed: iOS 18’s Enhanced Messaging Feature Needs This One Crucial Fix

    The humble Tapback, a staple of Apple’s iMessage since iOS 10, received a significant overhaul in iOS 18. No longer confined to a limited set of six reactions, users can now react to messages with any emoji, adding a new layer of expressiveness and nuance to digital conversations. This seemingly small change has dramatically altered how we interact within the Messages app. But amidst this welcome evolution, a glaring omission remains: the inability to selectively mute Tapback notifications.

    Since their introduction, Tapbacks have served as a quick and efficient way to acknowledge messages without interrupting the flow of conversation. A simple heart, thumbs up, or question mark can convey a multitude of meanings, from agreement and appreciation to confusion and query. With iOS 18, this functionality has expanded exponentially, allowing for a wider range of emotional responses and personalized reactions. However, this increased versatility comes with a potential downside: notification overload.

    Imagine you’re in a bustling group chat with dozens of participants. Every message triggers a cascade of Tapback notifications, each vying for your attention. While these reactions are intended to be subtle acknowledgments, their sheer volume can quickly become overwhelming, drowning out other, more important notifications. This is where the need for granular control over Tapback notifications becomes crucial.

    The Current State of Tapback Notifications

    Currently, iOS offers limited control over message notifications. You can either mute an entire conversation or allow all notifications to come through. This binary approach is insufficient for managing the influx of Tapbacks, especially in active group chats. While muting an entire conversation prevents notification fatigue, it also means you might miss crucial messages.

    The Solution: Granular Notification Control

    The ideal solution is to empower users with the ability to selectively mute Tapback notifications. This could be implemented through a dedicated toggle within a conversation’s settings, allowing users to choose whether they want to receive notifications for Tapbacks, message replies, or both.

    This granular control would offer several benefits:

    • Reduced Notification Overload: Users can prioritize message replies over Tapbacks, minimizing distractions and ensuring they don’t miss important information.
    • Enhanced User Experience: Greater control over notifications translates to a more personalized and enjoyable messaging experience.
    • Improved Focus: By filtering out less critical notifications, users can better concentrate on the conversations that matter most.

    My Personal Experience

    As an avid user of iMessage, I’ve experienced the evolution of Tapbacks firsthand. The expanded emoji library in iOS 18 has undoubtedly enriched my digital conversations, allowing me to express myself with greater precision and personality. However, I’ve also encountered the notification overload that comes with this increased flexibility.

    In particular, I’m part of a very active group chat with friends where Tapbacks are used liberally. Every joke, anecdote, or shared link triggers a flurry of reactions, each accompanied by a notification. While I appreciate the sentiment behind these acknowledgments, the constant buzzing and pinging can be quite distracting, especially when I’m trying to focus on work or other tasks.

    I yearn for the ability to silence these Tapback notifications without muting the entire conversation. I want to stay engaged with the group’s discussions without being bombarded by a constant stream of reaction alerts. This is why I believe granular notification control is a crucial addition to iOS 18’s Messages app.

    Looking Ahead

    Apple has a history of refining its software based on user feedback. The introduction of Focus Modes and other notification management tools demonstrates their commitment to providing a customizable and user-friendly experience. It’s my hope that Apple will address this Tapback notification issue in future updates to iOS, giving users the fine-grained control they need to manage their digital interactions effectively.

    Until then, we’ll have to rely on workarounds like temporarily muting conversations or disabling notifications altogether. But the potential for a more elegant solution exists, and I’m optimistic that Apple will deliver on this much-needed improvement.

  • Assassin’s Creed Infinity’s Animus Hub: Separating Fact from Fiction

    Assassin’s Creed Infinity’s Animus Hub: Separating Fact from Fiction

    Rumors have been swirling around Ubisoft’s upcoming Assassin’s Creed Infinity and its supposed “Animus Hub” – a central platform connecting various historical settings within the game. Some fans are excited about the potential for a more interconnected Assassin’s Creed experience, while others worry it might detract from the series’ traditional focus on individual historical narratives.

    Ubisoft has recently addressed these rumors, clarifying their vision for Infinity and shedding light on how players will experience different historical periods. This article delves into the heart of the Animus Hub rumors, examining Ubisoft’s official statements and exploring what this means for the future of the Assassin’s Creed franchise.

    What is Assassin’s Creed Infinity?

    Announced in July 2021, Assassin’s Creed Infinity represents a significant shift for the series. Unlike previous installments, which focused on a single historical setting, Infinity is envisioned as a live-service platform that will evolve over time, incorporating multiple historical periods and potentially even different gameplay styles. Think of it as a constantly expanding universe of Assassin’s Creed experiences.

    The Animus Hub: A Centralized Hub or a Misunderstanding?

    Initial reports suggested that Infinity would feature a central hub within the Animus – the virtual reality machine that allows users to relive their ancestors’ memories. This hub was envisioned as a futuristic environment where players could access different historical settings, similar to the Animus in the Assassin’s Creed movie.

    However, Ubisoft has clarified that this is not entirely accurate. While there will be a central menu to access different games within Infinity, it won’t be a persistent online world or a futuristic hub. Instead, each historical setting within Infinity will be its own distinct experience, with its own unique gameplay mechanics, art style, and narrative.

    Ubisoft’s Official Statement

    In a recent interview, Marc-Alexis Côté, VP Executive Producer of Assassin’s Creed, addressed the Animus Hub rumors directly. He emphasized that Infinity is not “a game as a service” in the traditional sense. While it will be a live-service platform with ongoing content updates, each historical experience within Infinity will be a complete and standalone game.

    Côté further clarified that the idea of a futuristic Animus hub is a misconception. He explained that Infinity is designed to be a platform that celebrates different periods and protagonists throughout history, offering a diverse range of Assassin’s Creed experiences.

    What This Means for Players

    Based on Ubisoft’s clarifications, here’s what players can expect from Assassin’s Creed Infinity:

    • Distinct Historical Experiences: Each historical setting in Infinity will be a fully-fledged game with its own unique identity, rather than a smaller section of a larger world.
    • No Persistent Online World: While Infinity will have online components, it won’t feature a persistent online world or a shared social space like some other live-service games.
    • Focus on Narrative: Despite the shift to a live-service model, Ubisoft has emphasized that narrative will remain a core pillar of the Assassin’s Creed experience in Infinity.

    My Thoughts and Concerns

    As a long-time fan of the series, I have mixed feelings about Assassin’s Creed Infinity. On the one hand, I’m intrigued by the potential for a constantly evolving Assassin’s Creed universe with a diverse range of historical settings. The idea of experiencing different time periods and protagonists with unique gameplay styles is exciting.

    However, I’m also concerned about the impact this live-service model might have on the series’ storytelling. Assassin’s Creed has always been known for its rich narratives and compelling characters. I worry that the focus on ongoing content updates and new releases might detract from the depth and complexity of individual stories.

    Furthermore, I’m slightly disappointed that the Animus Hub won’t be a fully realized feature. I think a central hub connecting different historical periods could have been a fascinating way to explore the overarching lore of the Assassin’s Creed universe and provide a sense of continuity between different games.

    Looking Ahead

    Despite my reservations, I remain cautiously optimistic about Assassin’s Creed Infinity. Ubisoft has a strong track record with the franchise, and I believe they understand the importance of delivering compelling narratives and engaging gameplay experiences.

    It’s crucial for Ubisoft to strike a balance between the live-service model and the core elements that make Assassin’s Creed special. They need to ensure that each historical setting within Infinity feels like a complete and satisfying game, with its own unique identity and a strong narrative focus.

    Only time will tell how Assassin’s Creed Infinity will ultimately shape the future of the franchise. However, based on Ubisoft’s recent clarifications, it’s clear that they are committed to delivering a diverse and engaging Assassin’s Creed experience that respects the series’ legacy while embracing new possibilities.