Facing unexpected issues with your Windows PC – perhaps a newly installed program causes crashes, a driver update leads to instability, or system settings get messed up? It’s a common scenario that can be incredibly frustrating. While a full factory reset might seem like the only solution, there’s a less drastic and often more convenient option: System Restore.
System Restore is a built-in feature of the Windows operating system that allows you to revert your computer’s system files, installed applications, Windows Registry, and system settings back to a previous point in time, known as a Restore Point. The crucial advantage of this method is that it’s designed to not affect your personal files. This means your documents, photos, videos, and other personal data stored in your user folders remain untouched during the restoration process.
This feature has been a staple of Windows since Windows Millennium Edition (Windows ME), serving as a vital troubleshooting tool. In modern Windows versions (Windows 10 and 11), it continues to be an invaluable safety net for software-related problems.
Understanding System Restore Points
A Restore Point is essentially a snapshot of your system at a particular moment. Windows automatically creates restore points during significant events like major updates, driver installations, or some software installations. You can also manually create a restore point before making potentially risky changes.
What a System Restore operation does and does not affect:
- Affects (Reverts):
- System files (core Windows files)
- Installed applications (programs you’ve installed)
- Drivers
- Windows Registry (the database of system settings)
- System settings (e.g., display settings, power options)
- Does NOT Affect:
- Your personal files (documents, pictures, music, videos, downloads)
- Emails
- Browser history or favorites (unless they are part of a program’s system files)
The goal is to reverse system-level changes that might be causing problems, effectively “undoing” recent software installations or configuration changes.
When to Use System Restore
System Restore is your go-to solution for:
- Resolving issues after installing a problematic program or driver.
- Fixing system instability that started after a recent change in settings.
- Recovering from unintended Windows Registry modifications.
- Addressing general system slowdowns that aren’t related to disk space or hardware.
- Dealing with minor malware infections that have altered system files (though a full scan is always recommended).
Pre-Restoration Steps (Important)
While System Restore is designed to protect your personal files, it’s always prudent to take a few preparatory steps to ensure peace of mind.
- Backup Critical Personal Files (Extra Precaution): Although System Restore generally doesn’t affect personal files, unforeseen circumstances can occur. For absolute peace of mind, consider quickly backing up your most critical documents, photos, and projects to an external drive or cloud storage. This is a universally good practice regardless of the troubleshooting step.
- Save Your Work: Close all open applications and save any active work before starting the restoration process.
- Ensure Power Stability: If you’re on a laptop, plug it into a power outlet. If you’re on a desktop, ensure a stable power supply. The restoration process should not be interrupted.
Step-by-Step Guide: Restoring Windows to an Earlier Date
This process is largely the same for both Windows 10 and Windows 11.
Method 1: From Within Windows (When Windows Can Boot)
This is the most common and easiest way if your computer can still boot into the operating system.
- Access System Restore:
- Click the Start button.
- Type create a restore point in the search bar and select the result that says “Create a restore point”. This will open the System Properties window to the System Protection tab.
- Alternatively, you can open the Control Panel, navigate to System and Security > System, and then click System protection on the left.
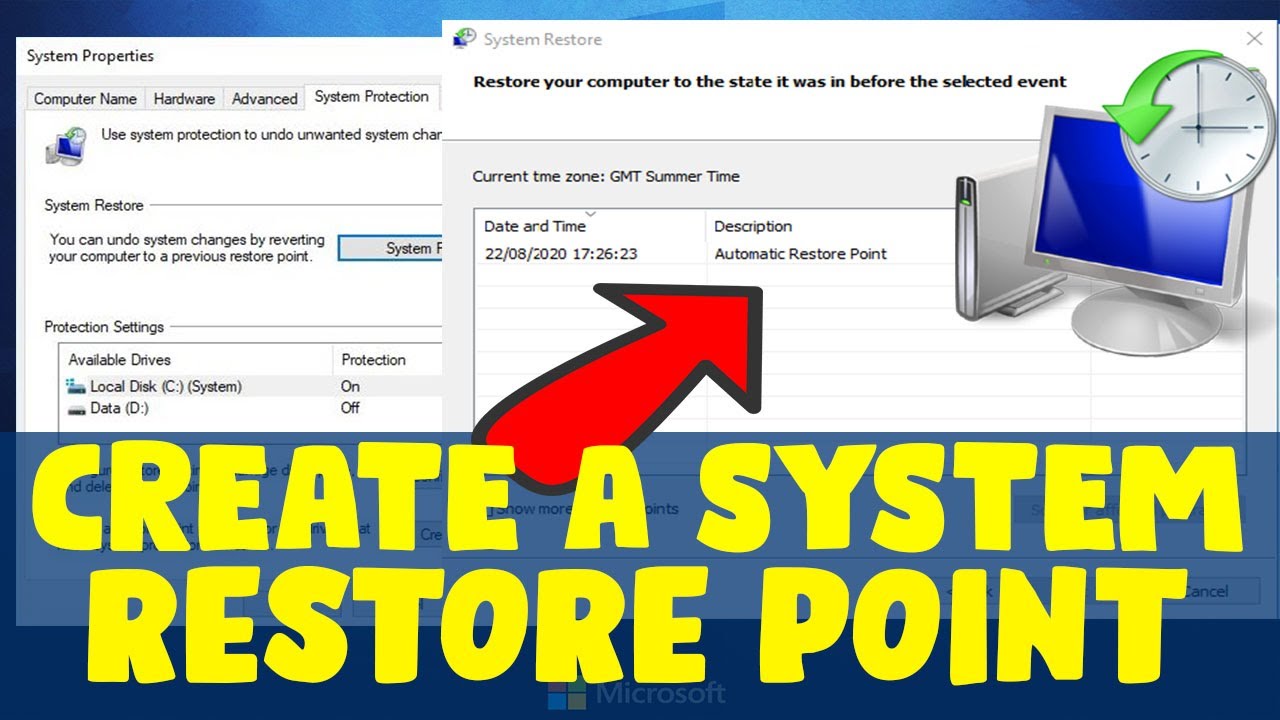
- Launch System Restore Wizard: In the System Protection tab, click the System Restore… button.
- Follow the Wizard:
- The System Restore wizard will open. Click Next.
- You will see a list of available restore points. These are typically listed by date and time, along with a description (e.g., “Installed Windows Update,” “Manual Restore Point”).
- Choose a restore point: Select the restore point that predates your system issue. For example, if your problem started on June 25, 2025, choose a restore point from June 24, 2025, or earlier.
- Show more restore points: If you don’t see a suitable point, check the box for “Show more restore points” to see a more comprehensive list.
- Scan for affected programs: It’s highly recommended to click “Scan for affected programs”. This will show you a list of programs and drivers that will be removed (because they were installed after the selected restore point) and programs that might be restored (because they were removed after the selected restore point). Review this list to understand the impact.
- Click Next.
- Confirm Restore Point: Review the restore point details and ensure it’s the correct one.
- Initiate Restore: Click Finish. You will see a warning that System Restore cannot be interrupted once it starts. Click Yes to confirm.
- Restart and Restore: Your computer will restart and begin the restoration process. This can take anywhere from a few minutes to an hour or more, depending on the size of the restore point and your system’s speed. Do NOT turn off or restart your computer during this process.
- Completion: Once complete, your computer will boot back into Windows, and a message will confirm that System Restore completed successfully.
Method 2: From Advanced Startup Options (When Windows Won’t Boot)
If your Windows PC fails to boot normally, you can access System Restore from the Advanced Startup Options (Windows Recovery Environment – WinRE).
- Access Advanced Startup Options:
- Method A (Force Shutdown): Turn on your computer. As soon as you see the Windows logo, immediately press and hold the power button until the computer turns off. Repeat this two or three times. On the third or fourth attempt, Windows should automatically enter the “Automatic Repair” environment, leading to “Advanced Startup Options.”
- Method B (Windows Installation Media): If Method A doesn’t work, you’ll need a Windows installation USB drive or DVD. Boot your PC from this media (you might need to change the boot order in BIOS/UEFI). On the “Windows Setup” screen, click Next, then click “Repair your computer” in the bottom-left corner.
- Navigate to System Restore:
- On the “Choose an option” screen, select Troubleshoot.
- Then select Advanced options.
- Click System Restore.
- Follow the Wizard:
- Select your account and enter your password if prompted.
- The System Restore wizard will launch, similar to Method 1.
- Choose a restore point and follow the on-screen prompts to complete the restoration.
- Your computer will restart and complete the process.
Important Notes and Limitations
- System Restore is Not a Backup: It’s critical to understand that System Restore is not a substitute for regular data backups. It only restores system files, applications, and settings, not your personal documents or other user data. Always back up your important files separately.
- Disk Space for Restore Points: System Restore requires dedicated disk space. If you don’t allocate enough, older restore points will be deleted automatically. Ensure System Protection is enabled for your system drive (usually C:) and enough space is allocated (typically 3-5% of drive capacity).
- Cannot Revert Major Windows Versions: System Restore cannot revert your Windows operating system to an earlier major version (e.g., from Windows 11 back to Windows 10, or from a major Windows 10 feature update like 22H2 back to 21H2). For that, you’d typically use the “Go back to the previous version” option in Recovery settings (available for a limited time after an upgrade) or a clean install.
- Driver Rollback: If a specific driver is causing issues, sometimes a driver rollback via Device Manager might be a quicker fix than System Restore, especially if you only want to affect that specific component.
- Malware: While System Restore can revert some system changes made by malware, it may not remove the malware itself if it’s deeply embedded or has affected areas outside of what System Restore monitors. Always follow up with a full anti-malware scan.
FAQ Section
Q1: Will System Restore delete my personal files, like photos and documents?
No, System Restore is designed to not affect your personal files. Your documents, photos, music, videos, and other user data will remain untouched during the restoration process. It primarily impacts system files, installed programs, drivers, and Windows Registry settings.
Q2: What is the difference between “System Restore” and “Reset this PC”?
System Restore reverts your system to an earlier state without touching personal files, focusing on undoing recent software changes. “Reset this PC” effectively reinstalls the entire Windows operating system, giving you the option to either keep your personal files (while removing all installed apps) or remove everything for a complete wipe. “Reset this PC” is a more drastic measure than System Restore.
Q3: Why can’t I find any restore points?
If you can’t find any restore points, it likely means that System Protection is not enabled for your system drive. You need to enable it first through the System Properties > System Protection tab and allocate disk space for restore points. Windows also automatically deletes older restore points to make space, so very old points might no longer be available.
Q4: How much space do restore points take up, and how many are kept?
The amount of space restore points take up depends on the percentage of your drive’s capacity you allocate (usually 3-5%). The number of points kept varies based on the allocated space and how frequently changes occur on your system. Once the allocated space is full, Windows automatically deletes the oldest restore points to make room for new ones.
Q5: Can I undo a System Restore?
Yes, in most cases, after performing a System Restore, Windows creates an “Undo Restore” point. If the restoration didn’t fix your problem or caused new issues, you can perform another System Restore and select the “Undo my last restoration” option to revert to the state before the restore.