Capturing your screen is a fundamental task, whether you’re saving information, sharing content, or troubleshooting. Windows’ built-in Snipping Tool offers a versatile solution for taking screenshots efficiently. This guide provides a comprehensive walkthrough on using the Snipping Tool in Windows 11, ensuring you can capture, edit, and save screenshots with ease.
Understanding the Snipping Tool
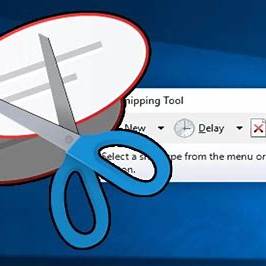
The Snipping Tool is a built-in Windows application designed for capturing screenshots. It allows users to capture the entire screen, specific windows, or custom areas. With features like annotation, cropping, and sharing, it’s a handy tool for various tasks.
Launching the Snipping Tool
There are multiple ways to open the Snipping Tool:
- Via Start Menu:
- Click on the Start button.
- Type Snipping Tool in the search bar.
- Select the Snipping Tool application from the results.
- Using Keyboard Shortcut:
- Press Windows + Shift + S simultaneously.
- This opens the snipping overlay directly, allowing immediate screenshot capture.
Capturing Screenshots
Once the Snipping Tool is open, you can choose from several capture modes:
- Rectangular Snip:
- Select a rectangular area by clicking and dragging the cursor.
- Freeform Snip:
- Draw a custom shape around the area you wish to capture.
- Window Snip:
- Click on a specific window to capture it entirely.
- Fullscreen Snip:
- Captures the entire screen, including all visible windows.
After selecting a mode, the screen dims slightly, indicating readiness for capture. Once captured, the screenshot is copied to the clipboard and opened in the Snipping Tool editor for further actions.
Editing and Annotating Screenshots
The Snipping Tool provides basic editing features:
- Pen and Highlighter:
- Draw or highlight areas within the screenshot.
- Eraser:
- Remove unwanted annotations.
- Crop:
- Trim the screenshot to focus on specific content.
- Text Actions:
- Extract text from the screenshot or redact sensitive information.
These tools enhance the utility of your screenshots, making them more informative and tailored to your needs.
Saving and Sharing Screenshots
After editing, you can save or share your screenshot:
- Save:
- Click the Save icon.
- Choose the desired location and file format (e.g., PNG, JPEG).
- Copy:
- Use the Copy icon to place the screenshot on the clipboard for pasting into other applications.
- Share:
- Click the Share icon to send the screenshot via email or other installed apps.
These options facilitate easy distribution and storage of your captured content.
Advanced Features
The Snipping Tool in Windows 11 includes additional functionalities:
- Delayed Capture:
- Set a delay (e.g., 3 or 10 seconds) before the screenshot is taken, allowing time to prepare the screen.
- Screen Recording:
- Capture video clips of your screen, useful for tutorials or demonstrations.
- Access this by clicking the Record button within the Snipping Tool.
These features expand the tool’s capabilities beyond static images.
Personal Experience and Tips
In my experience, the Snipping Tool has been invaluable for creating tutorials and documenting issues. The Windows + Shift + S shortcut is particularly convenient for quick captures. Utilizing the delayed capture feature has allowed me to capture transient menus and tooltips effectively.
Conclusion
The Snipping Tool in Windows 11 is a versatile and user-friendly utility for capturing and editing screenshots. Its range of features caters to both basic and advanced needs, making it a go-to tool for many users. By familiarizing yourself with its functionalities, you can enhance your productivity and communication.